
Navigation 2.0 – Routing On Flutter Web
Flutter provides an amazing imperative API and a declarative API or Navigator 2.0 based on the routing mechanism. Normally, Navigation is a core concept in mobile app development. These especially enable users to move from one screen to another.
Navigator 2.0 is a standard reference for declarative Navigation. These are suitable options for declarative Navigation without replacing Navigator 1.0.
Adding the Navigator widget
Restoring URLs based on the URL is an efficient option. Well-managed Navigation is a suitable option for keeping the app completely organized. These also enhance the capabilities to the maximum.
Navigator 1.0 lets the user easily add the page at the top of the navigation stack. This help removes even the topmost rule to the extent. The declarative mechanism allows controlling the navigation stack completely.
Flutter web app development gives the complete systems with navigating features between handling deep links and screens. It is also suitable for small applications without complex deep linking and gives Navigator better access.
Apps with specific deep links in Flutter with navigation requirements can also use the Router to handle deep links, such as Android and iOS. It will be a suitable option for staying in sync with the address bar, so the app runs on the web.
Also, Read This Post:
How to Test Navigation Via Navigator In Flutter ??
Advanced Navigator 2.0
Navigator 2.0 involves the standard reference, which is quite declarative Navigation. This does not replace Navigator 1.0; you can also use them together.
Navigator 2.0 provides the declarative API design and pages. These also introduce the new Router widget for easily gaining better aspects. Normally, there are 3 modes of screen available that allow Navigation.
Navigator 2.0 is one of the technology trumps predecessors, and it has added lots of new features. It also uses the amazing Navigator. Push which is a suitable option based on the requirements.
- Fluttershy-reactive declarative style
- Supports multiple pushes and pops
- Supports screen replacing
- Supports incoming URLs
- Supports browser history while with Flutter Web
Named routes are also a suitable option for navigating between the pages in the Flutter app development services. It will be a suitable option to work for the URL in the Flutter web apps.
These Named routes can also be used with the application for defining within the MaterialApp class in Flutter. MaterialApp.routes contain a map listing on each route, which is associated with the display widget.
MaterialApp.initialRoute determines the number of routes displayed as the application works. It involves the initialRoute required for the route to the greatest extent.
MaterialApp(
  initialRoute: '/',
  routes: {
    '/': (context) => const MyHomePage(),
    '/contact: (context) => const MyContacts(),
  },
);
Keeping the code organized best also allows the named route to be available in the static variables. The Flutter widgets can also be enabled properly with the refactor MaterialApp.routes. These can be easily defined as static variables, and Navigating between pages involves
MaterialApp(
  initialRoute: MyHomePage.route,
  routes: {
    MyHomePage.route: (context) => const MyHomePage(),
    MyContacts.route: (context) => const MyContacts(),
  },
);
Navigating between the pages is quite a significant option for pushing the named route in the navigator. It can be easily denoted as the following.
ElevatedButton(
onPressed: () {
Navigator.of(context).pushNamed('/contact');
},
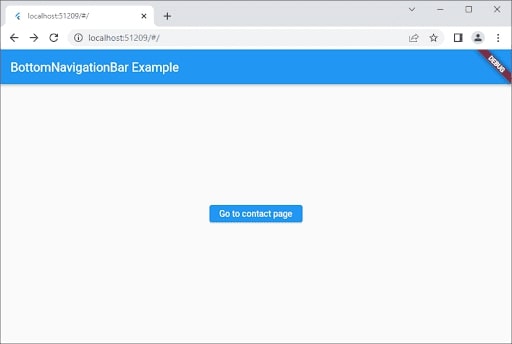
child: const Text("Go to contact page"),
),
Building and running the application on the web is quite a fantastic option. This also lets you easily type /#/overview inside the web browser, allowing you to access them accordingly. It also extensively pushes routes named overview for Navigator. The method also takes to the OverviewPage widget, which can be easily accessed innovatively.
Also, Read This Post:
Bottom Navigation Bar – Flutter Widget Guide By Flutter Agency
Best Navigator Widget
The Navigator widget displays the screen as the stack using exact transition animations. These involve a better target platform suitable for improving the stability of access to them. It is a convenient option for navigating a new screen to access the Navigator with the route’s BuildContext. The method also involves imperative methods like push() or pop():
onPressed: () {
  Navigator.of(context).push(
    MaterialPageRoute(
      builder: (context) => const ContactPage(),
    ),
  );
},
Navigator keeps the stack on the Route object, so these also represent the history stack. Implementing the push() method gives Route objects to the extent. MaterialPageRoute object is also the subclass of Route, which the specific transition animations give the Material Design.
Navigation 2.0 – Routing On Flutter Web provides better ways to save time. Imperative navigation techniques are also helpful for easily gaining the push-and-pop route with the navigation stack. These do not handle any web history and web URLs. The Flutter experts developed a new declarative navigation technique for handling URLs and histories.
These also play an integral part in route management to an extent. There are also different techniques involved in managing the Route with Navigation 2.0.
How to Route using OnGenerateRoute?
Routing with the onGenerateRoute is an amazing option for the different pages. These use the simple Navigator.Push(), and many other methods. The page also changes with the URL giving you better access to the extent. It does not save the history file to that extent.
onGenerateRoutes involves the route generator callback suitable for the app. This help navigate the named route. It gives better access for generating the route for navigating the different pages with sync changes in the URL for the browser.
The system requires the 2 route files (for cleaner code), and it is defined as route names along with the onGenerateRoute class. The routes_name file gives you a better corresponding to the route name, so you can easily follow the below.
class RoutesName {
  // ignore: non_constant_identifier_names
  static const String FIRST_PAGE = '/;
  // ignore: non_constant_identifier_names
  static const String SECOND_PAGE = '/second_page';
}
There are 2 pages involved, such as FIRST_PAGE and SECOND_PAGE. It is pretty convenient for creating the reusable onGenerateRoute class in the second routes file.
class RouteGenerator {
  static Route<dynamic> generateRoute(RouteSettings settings) {
    switch (settings.name) {
      case RoutesName.FIRST_PAGE:
        return _GeneratePageRoute(
            widget: const MyHomePage(), routeName: settings.name);
      case RoutesName.SECOND_PAGE:
        return _GeneratePageRoute(
            widget: const MyContacts(), routeName: settings.name);
      default:
        return _GeneratePageRoute(
            widget: const MyHomePage(), routeName: settings.name);
    }
  }
Route settings allow getting Routes name by navigating the corresponding page. The _GeneratePageRoute involves a class extending PageRouteBuilder. These are also useful for navigating the transition animation to the extent.
Also, Read This Post:
What is the Difference Between onGenerateRoute and routes In Flutter ??
Example
import 'package:flutter/material.dart';
void main() {
runApp(const MyApp());
}
class MyApp extends StatelessWidget {
const MyApp({super.key});
@override
Widget build(BuildContext context) {
return MaterialApp(
initialRoute: '/',
routes: {
'/': (context) => const MyHomePage(),
'/contact': (context) => const MyContacts(),
},
);
}
}
class MyHomePage extends StatefulWidget {
const MyHomePage({Key? key}) : super(key: key);
@override
State<StatefulWidget> createState() {
return MyHomePageState();
}
}
class MyHomePageState extends State<MyHomePage> {
@override
Widget build(BuildContext context) {
return Scaffold(
appBar: AppBar(
title: const Text("BottomNavigationBar Example"),
),
body: Center(
child: ElevatedButton(
onPressed: () {
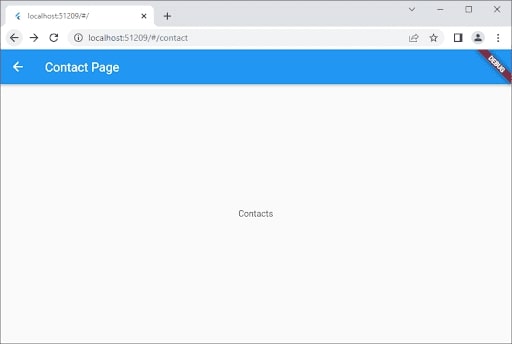
Navigator.of(context).pushNamed('/contact');
},
child: const Text("Go to contact page"),
),
)
);
}
}
class MyContacts extends StatelessWidget {
const MyContacts({super.key});
@override
Widget build(BuildContext context) {
return Scaffold(
appBar: AppBar(
title: const Text("Contact Page"),
),
body: const Center(child: Text("Contacts")));
}
}
Output
MaterialApp lets you add the routes for onGenerateRoute. It also allows the initial route, the page loading aspects, with the corresponding route. These give the better attribute with the initial route based on the URL. Builder property in the material app widget lets you insert the widget accordingly.

Conclusion
Usually, Navigator 2.0 provides the new declarative API design along with the pages. These are enabled with the existing Navigator widget. A router widget will be used in the process for ensuring to improve the routing. New API introduces a better range of components for quickly parsing URLs entered with the Web browser’s address.
This article will explain routing and navigation, two functionalities in the Flutter app development. However, this feature will make it simple to build full-fledged features in Flutter with just a few lines of code! I hope you guys have enjoyed the article and got an accurate idea about the routing in Flutter. To develop such functionality in mobile app development, you must hire Flutter app experts to make your high-end mobile apps with rich functionalities. Let us know your requirement.
Frequently Asked Questions (FAQs)
1. What is the difference between Navigator and Navigation 2.0 in Flutter development?
Navigator 2.0 is a standard reference for declarative navigation and will not replace Navigator 1.0, as you can utilize them all together. Navigator 2.0 gives the new declarative API design, Pages, for an existing Navigator widget. Hence, it will introduce the new Router widget.
2. Is the Navigator widget in Flutter technology?
In Flutter, these elements are called routes and are managed by the Navigator widget. Navigator manages the stack of Route objects and will give two ways to manage the stack: declarative API Navigator.pages or imperative API Navigator.push and Navigator.
3. How can I navigate to another page in the Flutter web app?
Concepts like pages are known as routes in Flutter. We can use Navigator.push() to navigate the latest route and Navigator.pop() to navigate an earlier route.
4. Which database is compatible with Flutter development?
Flutter apps can make use of SQLite databases through the sqlite plugin that is available on the pub.

Contemporary ventures
Recent blog


Join our newsletter
Read and share new topics about all things Tech.
ready to get started?
Fill out the form below and we will be in touch soon!
"*" indicates required fields