
How to Use CompositedTransformFollower Class In Flutter?
In Flutter, By adding them to the overlay’s stack, you can print visual components on top of other widgets.
A widget is added to the overlay using an OverlayEntry, and the entry’s position within the overlay is selected using Positioned and AnimatedPositioned.
Companies can easily hire Flutter developers from our portal to implement the following widgets for their applications for building seamless business applications for their customers. Consult our developer for more support.
Similar to the Stack widget, this is helpful when you require an item to show on top of another widget. However, you may use this widget anywhere without changing your entire codebase.
You can do this using the CompositedTransformTarget, CompositedTransformWidget, LayerLink, Overlay, and OverlayEntry widgets.
Here is the constructor of the CompositedTransformFollower class.
	CompositedTransformFollower({
Key? Key,
required LayerLink link,
bool showWhenUnlinked = true,
Offset offset = Offset.zero,
Alignment targetAnchor = Alignment.topLeft,
Alignment followerAnchor = Alignment.topLeft,
Widget? child}
)
LayerLink link: This CompositedTransformFollower is linked to a CompositedTransformTarget by the link object.
Bool showWhenUnlinked: If showWhenUnlinked is true, the child is visible and not relocated when the widget is not linked; if it is false, the child is hidden.
Offset: The extra offset must be added to the associated CompositedTransformTarget’s target anchor to determine the position of this widget’s followed anchor.
Alignment targetAnchor: the location where followerAnchor will align itself on the connected CompositedTransformTarget as an anchor.
Alignment followerAnchor: The widget’s anchor point will align with the connected CompositedTransformTarget’s followerAnchor.
Widget? child: There can only be one child on this widget. Allow a widget with a child’s attributes, such as Row, Column, or Stack, to be this widget’s child to arrange numerous children. Then give the children that widget.
To “glue” the widgets together when an overlay entry needs to follow a “target” that is not on the overlay stack, use CompositedTransformTarget, CompositedTransformFollower, and LayerLink. To achieve this, you must:
A CompositedTransformFollower should be used to wrap the widget on the overlay.
A descendant of CompositedTransformTarget must be the follower.
A CompositedTransformTarget must be used to encase the target Widget.
The follower and target are joined together by a LayerLink instance.
Example:
import 'package:flutter/material.dart';

void main() {
  runApp(const MaterialApp(home: Slide()));
}
class Slide extends StatefulWidget {
  const Slide({Key? key}) : super(key: key);
  @override
  _SlideState createState() => _SlideState();
}

class _SlideState extends State {
  final double indicatorWidth = 24.0;
  final double indicatorHeight = 300.0;
  final double slideHeight = 200.0;
  final double slideWidth = 400.0;

  final LayerLink layerLink = LayerLink();
  OverlayEntry? overlayEntry;
  Offset indicatorOffset = const Offset(0, 0);

  Offset getIndicatorOffset(Offset dragOffset) {
    final double x = (dragOffset.dx - (indicatorWidth / 2.0))
        .clamp(0.0, slideWidth - indicatorWidth);
    final double y = (slideHeight - indicatorHeight) / 2.0;
    return Offset(x, y);
  }

  void showIndicator(DragStartDetails details) {
    indicatorOffset = getIndicatorOffset(details.localPosition);
    overlayEntry = OverlayEntry(
      builder: (BuildContext context) {
        return Positioned(
          top: 0.0,
          left: 0.0,
          child: SizedBox(
              width: indicatorWidth,
              height: indicatorHeight,
              child: CompositedTransformFollower(
                offset: indicatorOffset,
                link: layerLink,
                child: Container(
                  color: Colors.blue,
                ),
              )),
        );
      },
    );
    Overlay.of(context).insert(overlayEntry!);
  }

  void updateIndicator(DragUpdateDetails details) {
    indicatorOffset = getIndicatorOffset(details.localPosition);
    overlayEntry?.markNeedsBuild();
  }

  void hideIndicator(DragEndDetails details) {
    overlayEntry?.remove();
  }

  @override
  Widget build(BuildContext context) {
    return Scaffold(
      appBar: AppBar(title: const Text('Overlay Indicator')),
      body: Center(
        child: CompositedTransformTarget(
          link: layerLink,
          child: Container(
            width: slideWidth,
            height: slideHeight,
            color: Colors.blue.withOpacity(0.2),
            child: GestureDetector(
              onPanStart: showIndicator,
              onPanUpdate: updateIndicator,
              onPanEnd: hideIndicator,
            ),
          ),
        ),
      ),
    );
  }
}
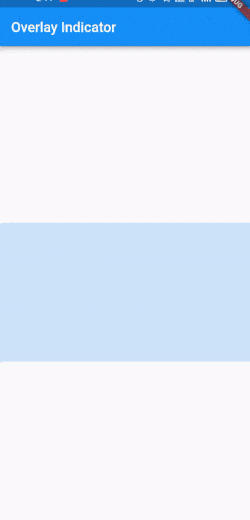
Output

Conclusion
Using the overlay and connecting the widgets is an easy and effective strategy for developing a user interface (UI) that floats widgets on top of other widgets. You discovered how to join these widgets with a LayerLink in this article.

Contemporary ventures
Recent blog


Join our newsletter
Read and share new topics about all things Tech.
ready to get started?
Fill out the form below and we will be in touch soon!
"*" indicates required fields