A Step-by-Step Tutorial for Beginners: Making a Tic-Tac-Toe Game in Flutter
To discover Flutter, a well-liked open-source framework for creating natively built applications for mobile, web, and desktop from a single codebase, play the timeless game of tic-tac-toe. This article will show you how to use Flutter to build a basic Tic-Tac-Toe game from scratch. By the end of it, you’ll have a playable game and a better grasp of Flutter app development fundamental ideas.
Step 1: Set Up Your Flutter Project
Make sure Flutter and Dart are set up on your PC before we start writing code. If not, configure your environment using the official Flutter installation manual.
Once Flutter is installed, use the following command to start a new Flutter project:
flutter create tic_tac_toe
This will create a brand-new Flutter project with the name tic_tac_toe. Please click here to access the project directory:
cd tic_tac_toe
Step 2: Develop the game board
Let’s now begin creating the game board. To generate the grid for Tic-Tac-Toe, we’ll utilize a GridView widget. Open the lib/main.dart file and add the following code to its contents:
void main() {
  runApp(const MyApp());
}
class MyApp extends StatefulWidget {
  const MyApp({super.key});
  @override
  State createState() => _MyAppState();
}
class _MyAppState extends State {
  @override
  Widget build(BuildContext context) {
    return const MaterialApp(
      debugShowCheckedModeBanner: false,
      home: TicTacToe(),
    );
  }
}
We now have a simple Flutter app that has a placeholder for the game board.
Step 3: Making the Game Logic
Let’s move on the game logic into action. We’ll use a 2D list to represent the game state where each cell can either be empty, “X,” or “O.” We’ll also keep tabs on the active player.
Put the following code in place of the TicTacToe widget:
class TicTacToe extends StatefulWidget {
  const TicTacToe({super.key});


  @override
  _TicTacToeState createState() => _TicTacToeState();
}
The _TicTacToeGameState class continues with:
class _TicTacToeState extends State<TicTacToe> {
List<List<String>> gameGrid = [];
  String currentPlayer = '';


  @override
  void initState() {
    super.initState();
    startGame();
  }


  void startGame() {
    gameGrid = List.generate(3, (_) => List.filled(3, ''));
    currentPlayer = 'X';
    setState(() {});
  }
The TicTacToeGame widget, which controls game state and sets up the game board, has been added to this code. We show who is playing currently and provide the option to restart the game.
Step4: Implementing the Game Board UI
Let’s now design the UI for the game board. To create the Tic-Tac-Toe grid, replace the // Game board UI goes here comment with the code below:
@override
  Widget build(BuildContext context) {
    return Scaffold(
      body: GridView.builder(
        gridDelegate: const SliverGridDelegateWithFixedCrossAxisCount(
          crossAxisCount: 3,
        ),
        itemCount: 9,
        itemBuilder: (context, index) {
          final row = index ~/ 3;
          final col = index % 3;
          return GestureDetector(
            onTap: () => onCellTapped(row, col),
            child: Container(
              decoration: BoxDecoration(
                border: Border.all(),
              ),
              child: Center(
                child: Text(
                  gameGrid[row][col],
                  style: const TextStyle(fontSize: 48),
                ),
              ),
            ),
          );
        },
      ),
    );
  }
Here, a 3×3 grid of cells is built using a GridView.builder. To handle tapping, we encapsulate each cell in a GestureDetector. The onCellTapped function, which we’ll implement next, is invoked when a cell is tapped.
Step 5: Integrating Cell Tapping and Win Detection
Let’s now develop the win detection and cell tapping missing functions. The TicTacToeGame class should be updated with the following code:
 void onCellTapped(int row, int col) {
    if (gameGrid[row][col].isEmpty) {
      setState(() {
        gameGrid[row][col] = currentPlayer;
        currentPlayer = (currentPlayer == 'X') ? 'O' : 'X';
      });


      String winner = checkForWinner();
      if (winner.isNotEmpty) {
        showWinnerDialog(winner);
      }
    }
  }
The checkForWinner method in this code looks for win conditions while the onCellTapped function updates the board whenever a cell is tapped. Using the showWinnerDialog function, we show a dialog if there is a winner or a draw.

Functions
String checkForWinner() {
for (int i = 0; i < 3; i++) {
if (gameGrid[i][0] == gameGrid[i][1] &&
gameGrid[i][1] == gameGrid[i][2] &&
gameGrid[i][0].isNotEmpty) {
return gameGrid[i][0];
}
if (gameGrid[0][i] == gameGrid[1][i] &&
gameGrid[1][i] == gameGrid[2][i] &&
gameGrid[0][i].isNotEmpty) {
return gameGrid[0][i];
}
}
if (gameGrid[0][0] == gameGrid[1][1] &&
gameGrid[1][1] == gameGrid[2][2] &&
gameGrid[0][0].isNotEmpty) {
return gameGrid[0][0];
}
if (gameGrid[0][2] == gameGrid[1][1] &&
gameGrid[1][1] == gameGrid[2][0] &&
gameGrid[0][2].isNotEmpty) {
return gameGrid[0][2];
}
bool isDraw = true;
for (int i = 0; i < 3; i++) {
for (int j = 0; j < 3; j++) {
if (gameGrid[i][j].isEmpty) {
isDraw = false;
break;
}
}
}
if (isDraw) {
return 'Draw';
}
return '';
}
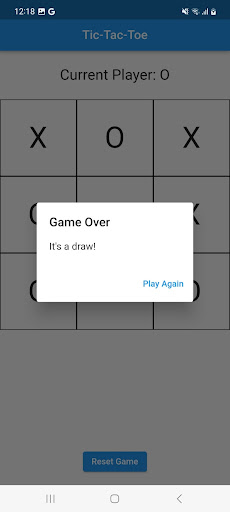
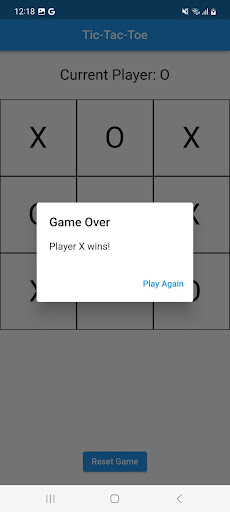
void showWinnerDialog(String winner) {
showDialog(
context: context,
builder: (context) => AlertDialog(
title: const Text('Game Over'),
content:
Text(winner == 'Draw' ? 'It\'s a draw!' : 'Player $winner wins!'),
actions: [
TextButton(
onPressed: () {
resetGame();
Navigator.pop(context);
},
child: const Text('Play Again'),
),
],
),
);
}
These functions are in charge of determining if the game has a winner or a draw and displaying a dialog when it is over.
Step 6: Restarting the game
To allow participants to restart a game, let’s finally build the resetGame function:
void resetGame() {
    setState(() {
      startGame();
    });
  }
When the “Play Again” button in the dialog is hit, we use this function to reset the game board and the current player.
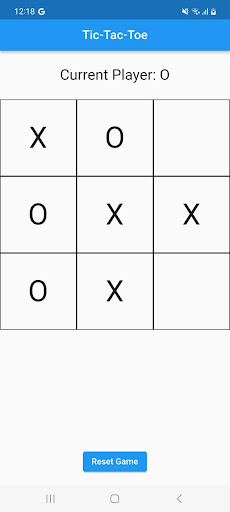
Step 7: Playing Your Game of Tic-Tac-Toe
Once the implementation is complete, use the following command to play a game of tic-tac-toe:
Flutter run
With this, you can start the game on a physical or virtual device.
Output
Conclusion
In this article, you created a simple Tic-Tac-Toe game from scratch in Flutter. You now know how to set up a Flutter project, make the game board, control the game’s logic, deal with user interactions, and show the result of the game. To make your game even more captivating, feel free to include animations, unique styling, or more features. Happy Coding!
Therefore, you can consult a Flutter app developer who will provide you with support and maintain your complete game from scratch. As a result, it creates a game that functions effectively and fluidly.
Frequently Asked Questions (FAQs)
1. How do you enjoy tic tac toe?
On the paper, create a grid with nine squares. Each player takes it in turn to place one of their counters in a square with their counters in front of them. The objective is to line up three counters in a row. Players must work to form a row of three while preventing their rivals from doing the same.
2. How can a tic tac toe game be created in Flutter?
Yes, here are the quick steps for creating a tic tac toe game in Flutter:
- New Flutter projects should be made.
- Make a nine-square grid.
- Each square should have event handlers added so that the player can click on them to leave their mark.
- Observe which player is now taking turns.
- After each move, determine the winner.
- If there is a tie, indicate it in the message.
3. What language does Flutter use?
Flutter apps are made with the Dart programming language, which makes use of many of its more advanced features. Release versions of Flutter apps use ahead-of-time (AOT) compilation across all platforms for greater performance, with the exception of the web, where code is transpiled to JavaScript.

Contemporary ventures
Recent blog


Join our newsletter
Read and share new topics about all things Tech.
ready to get started?
Fill out the form below and we will be in touch soon!
"*" indicates required fields