
Key to Interactive UI Design: Inkwell Flutter
While touch-based interaction increases an application’s usefulness, adding visual feedback increases the application’s aesthetic appeal. Your application interfaces will look like this after using Inkwell Flutter.
GestureDetector and Flutter Inkwell are two widgets that react to touch inputs, just like Flutter offers many other widgets. GestureDetector, which incorporates a material design ink splash on touch interactions, is one step behind Inkwell Flutter in this aspect.
Let’s explore the ripple impact of Inkwell Flutters and how it improves the user experience of mobile applications.
InkWell Flutter: What Is Its Meaning?
In Flutter, the material widget of its Inkwell reacts to each touch a user makes when interacting with an application. It is more like an illustrative representation of what happens when we repeatedly hit or double-click the button. Pressing a button causes ripples to appear, much like a pebble in a stream of water.
It assures the user that the application has received your command.
Class of Flutter Inkwell
A material app widget with a rectangular shape called the Flutter Inkwell class offers a touch-responsive region. After touching it, there is an immediate ripple response on the screen.
Using the Material Widget with Flutter Inkwell
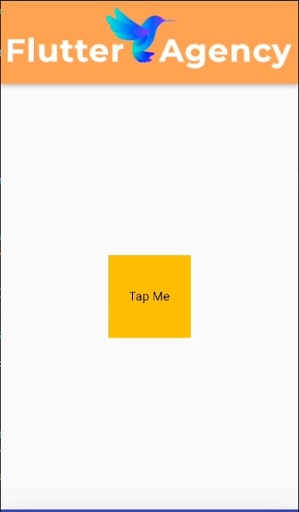
To achieve this, wrap the Flutter Inkwell widget in the Material widget. The Flutter Inkwell onTap function is called when you tap the Material widget, and the console will print “Material widget tapped!” as a result. Then, you may choose a background colour (yellow) and set the container’s width and height to 100 pixels.
The Flutter Inkwell class always utilizes a material widget as an ancestor to ensure the ink is splashed into the rectangle section properly.
Example
class inkWellWidget extends StatefulWidget {
  const inkWellWidget({super.key});


  @override
  State<inkWellWidget> createState() => _inkWellWidgetState();
}


class _inkWellWidgetState extends State<inkWellWidget> {
  @override
  Widget build(BuildContext context) {
    return SafeArea(
      child: Scaffold(
        appBar: AppBar(
          toolbarHeight: 100,
          flexibleSpace: const Padding(
            padding: EdgeInsets.all(8.0),
            child: Image(
              image: AssetImage('assets/light_logo.png'),
              fit: BoxFit.cover,
            ),
          ),
        ),
        body: Center(
          child: Material(
            color: Colors.amber[500],
            child: InkWell(
              onTap: () {
                print('Material widget tapped!');
              },
              child: const SizedBox(
                width: 100.0,
                height: 100.0,
                child: Center(child: Text('Tap Me')),
              ),
            ),
          ),
        ),
      ),
    );
  }
}
Output
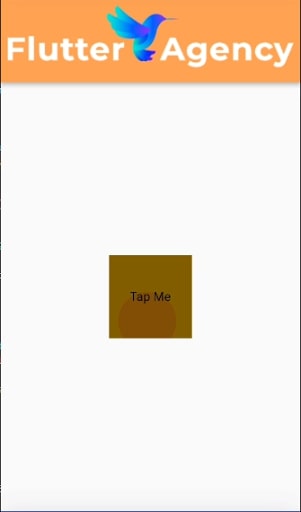
Additionally, you can change the splash and highlight colours to suit your preferences. In the sample below, the Flutter Inkwell colour has been modified so that the splash is red and the highlight is black. To improve transparency, we have also changed the opacity of the colours. In the example below, we altered the red (the splash colour) to have a 30% opacity, while the highlight colours have a 50% opacity.
Here’s how to go about it:
class inkWellWidget extends StatefulWidget {
  const inkWellWidget({super.key});


  @override
  State<inkWellWidget> createState() => _inkWellWidgetState();
}


class _inkWellWidgetState extends State<inkWellWidget> {
  @override
  Widget build(BuildContext context) {
    return SafeArea(
      child: Scaffold(
        appBar: AppBar(
          toolbarHeight: 100,
          flexibleSpace: const Padding(
            padding: EdgeInsets.all(8.0),
            child: Image(
              image: AssetImage('assets/light_logo.png'),
              fit: BoxFit.cover,
            ),
          ),
        ),
        body: Center(
          child: Material(
            color: Colors.amber[500],
            child: InkWell(
              onTap: () {
                print('Material widget tapped!');
              },
              splashColor: Colors.red.withOpacity(0.3),
              highlightColor: Colors.black.withOpacity(0.5),
              child: const SizedBox(
                width: 100.0,
                height: 100.0,
                child: Center(child: Text('Tap Me')),
              ),
            ),
          ),
        ),
      ),
    );
  }
}
Output
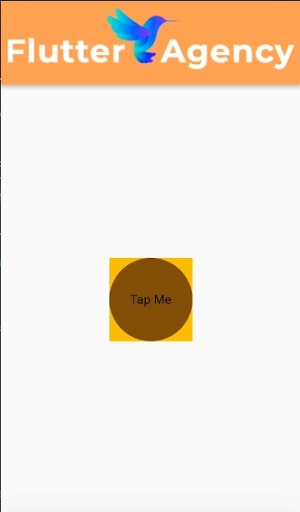
The Inkwell Flutter shape can be customized by adding personal touches, much like the colour. It typically presents as a rectangular block. The ‘borderRadius’ or ‘customBorder’ Property can be used.
Here’s how to go about it:
Utilizing the customBorder Property
class inkWellWidget extends StatefulWidget {
  const inkWellWidget({super.key});


  @override
  State<inkWellWidget> createState() => _inkWellWidgetState();
}


class _inkWellWidgetState extends State<inkWellWidget> {
  @override
  Widget build(BuildContext context) {
    return SafeArea(
      child: Scaffold(
        appBar: AppBar(
          toolbarHeight: 100,
          flexibleSpace: const Padding(
            padding: EdgeInsets.all(8.0),
            child: Image(
              image: AssetImage('assets/light_logo.png'),
              fit: BoxFit.cover,
            ),
          ),
        ),
        body: Center(
          child: Material(
            color: Colors.amber[500],
            child: InkWell(
              onTap: () {
                print('Material widget tapped!');
              },
              customBorder: RoundedRectangleBorder(
                borderRadius: BorderRadius.circular(50),
              ),
              splashColor: Colors.red.withOpacity(0.3),
              highlightColor: Colors.black.withOpacity(0.5),
              child: const SizedBox(
                width: 100.0,
                height: 100.0,
                child: Center(child: Text('Tap Me')),
              ),
            ),
          ),
        ),
      ),
    );
  }
}
Output
What Purpose Does the Inkwell Perform in Flutter?
Have you ever wondered what’s important of Inkwell Flutter?
Typically, the touch interactions within the application are handled by InkWell. The Inkwell Flutter Widget serves the following purposes:
- InkWell observes user actions when they tap, long press, or double tap on a widget. It recognizes these motions and triggers the required callbacks, letting you respond to user interactions.
- Text, images, or containers can all be wrapped with InkWell to make other widgets interactive. You can create interactive UI elements.
- The widget follows the material design principles according to the InkWell ripple effect.
Common Techniques in Inkwell Flutter
Inkwell Flutter recognizes the following motions because it is entirely focused on touch interactions:
1. onTap: When the user presses the widget, the onTap gesture is started.
2. onLongPress: this action initiates when the user presses and holds the button for a long period.
3. onTapCancel: This gesture, called onTapCancel, is unfamiliar to most people. It begins when a user begins to tap a widget but stops it by taking their finger off it before releasing it. It has nothing to do, especially with terminating a tap by tapping again.
4. onHover: This is activated when the pointer reaches the widget’s bounds. The onHover Property won’t be called again until the pointer returns after leaving the widget’s bounds.
5. onFocusChange: The onFocusChange attribute is activated when the InkWell widget’s focus changes. This may happen if the user presses the widget if the widget is given programmatic focus, or if the user’s attention is drawn to another widget. A boolean value passed to the callback indicates whether the widget has gained focus (true) or lost focus (false).
Use the onFocusChange Property to do any action you want when the Inkwell widget’s focus changes. For instance, you can launch a brand-new window, change the widget’s colour, or show or hide the keyboard.

How Can Ripple Effect Be Removed From InkWell Flutter?
The Inkwell ripple effect can be eliminated by setting the highlightColor and splashColor values to Colors.transparent.
class inkWellWidget extends StatefulWidget {
  const inkWellWidget({super.key});


  @override
  State<inkWellWidget> createState() => _inkWellWidgetState();
}


class _inkWellWidgetState extends State<inkWellWidget> {
  @override
  Widget build(BuildContext context) {
    return SafeArea(
      child: Scaffold(
        appBar: AppBar(
          toolbarHeight: 100,
          flexibleSpace: const Padding(
            padding: EdgeInsets.all(8.0),
            child: Image(
              image: AssetImage('assets/light_logo.png'),
              fit: BoxFit.cover,
            ),
          ),
        ),
        body: Center(
          child: Material(
            color: const Color.fromARGB(255, 200, 204, 208),
            borderRadius: BorderRadius.circular(50),
            child: InkWell(
              onTap: () {
                print('Material widget tapped!');
              },
              customBorder: RoundedRectangleBorder(
                borderRadius: BorderRadius.circular(50),
              ),
              splashColor: Colors.red.withOpacity(0.3),
              highlightColor: Colors.black.withOpacity(0.5),
              child: const SizedBox(
                width: 200.0,
                height: 200.0,
                child: Center(
                  child: Padding(
                    padding: EdgeInsets.all(8.0),
                    child: Image(
                      image: AssetImage('assets/light_logo.png'),
                      fit: BoxFit.cover,
                    ),
                  ),
                ),
              ),
            ),
          ),
        ),
      ),
    );
  }
}
Output

Some of the GestureDetector’s Use
GestureDetector performs in the following situations:
1. Custom Gesture Recognition: GestureDetector allows you to design your own gesture recognition logic when you need to recognize separate or sophisticated touch gestures not covered by the built-in gestures offered by other widgets.
2. Non-Material Design Interface: GestureDetector can be used to build your preferred touch interactions if you desire to create a custom touch interaction that doesn’t necessarily comply with the Material design principles, and visual feedback like ripples is unnecessary.
3. Combining with Non-Tappable Widgets: In some circumstances, you may need to integrate touch gesture recognition into a widget that doesn’t natively accept gestures, such as an image or a custom-built widget. In these circumstances, touch activities can be recorded using GestureDetector.
Use Cases of InkWell
These use cases are suitable for InkWell:
1. Material Design Compliance: InkWell becomes an obvious option if you want to follow the Material Design principles for touch feedback and offer a consistent user experience throughout the project. It takes care of the ink splash effect and ripple motion automatically, guaranteeing that the touch interactions in your app follow Material Design guidelines.
2. Tap Interactions: InkWell makes it easier to give visual feedback for tap interactions on particular widgets like buttons, list items, or tiles by using the ink splash effect and ripple a motion. You can easily get the desired touch feedback by wrapping these widgets in InkWell.
3. Callbacks for certain gestures: InkWell offers useful callback features like onTap, onDoubleTap, onLongPress, and onHighlightChanged. This makes it simple to respond to particular gesture events with customized actions.
Inkwell vs Flutter Gesturedetector
Even though both focus on touch interaction, the results vary. Inkwell Flutter displays a ripple effect to visually represent the touch interaction with the application where the Flutter GestureDetector captures it. While InkWell shows what a GestureDetector does on the screen, a GestureDetector Flutter is a non-visual widget.
Additionally, only the onTap, onLongpressed, or Inkwell and GestureDetector can use other motions specified; the GestureDetector may also use more complicated controls like pinch, swipe, or dragging features.
Putting it simply, the GestureDetector takes a backseat, while InkWell adds a decorative touch to your application.
Conclusion
The Flutter Inkwell serves the same objective as another widget in the Flutter cross-platform framework. Every time the widget is tapped, a ripple effect is added, improving the user experience. Though simple and more precise. It provides the user with a visual representation of its touch interactions.
To implement Ui element with Inkwell in your existing Flutter apps, contact our experienced Flutter app developer. The skilled team of app developers at Flutter Agency is dedicated to helping you with Inkwell in Flutter using the right approaches.
Frequently Asked Questions (FAQs)
1. How do you use the Flutter InkWell button?
We add an InkWell widget as a Material widget’s child. Finally, we include an onTap handler. Only after a gesture callback, in this case, onTap is introduced the InkWell splash effect can be seen. When the fingerprint icon is tapped using the code, the splash effect will be generated.
2. What function does the widget key provide in Flutter?
When a widget switches from one branch to another in the widget tree, Flutter uses keys to store the widget’s current state. Nearly every widget contains keys as named parameters. It comes in handy when we need to keep the state of a widget with the same kind of data.
3. What is the Flutter InkWell key?
A rectangular patch of a material that responds to touch in an application is known as the InkWell class in Flutter. A material widget must be the ancestor of the InkWell widget. The real ink reactions take place in the material widget. Clicking the button causes InkWell reactions to react.

Contemporary ventures
Recent blog


Join our newsletter
Read and share new topics about all things Tech.
ready to get started?
Fill out the form below and we will be in touch soon!
"*" indicates required fields