How to Solve No Connected Devices in Flutter ?
When users create a sample application with Flutter with Fresh Installation sometimes when they run a flutter run they get an error like No Connected Devices. So in today’s article, we will learn How to Solve No Connected Devices in Flutter.
How to Solve No Connected Devices in Flutter?
When the user receives an error like No Connected Devices in Flutter users first need to run a command like below:
flutter doctor
Depending on the output we get from the above command user can perform the action like below:
Flutter supports both iOS and Android devices/simulators.
In the terminal, run the flutter devices command to verify that Flutter recognizes your connected Android device.
For, Android (on mac system) Set up your Android device
To prepare to run and test your Flutter app on an Android device, you’ll need an Android device running Android 4.1 (API level 16) or higher.
Follow the steps as below:
- Enable Developer Options and USB debugging on your device. Detailed instructions are available in the Android documentation.
- Using a USB cable, plug your phone into your computer. If prompted on your device, authorize your computer to access your device.
- In the terminal, run the Flutter devices command to verify that Flutter recognizes your connected Android device.
- Start your app by running a Flutter run.
Set up the Android emulator
To prepare to run and test your Flutter app on the Android Emulator, follow these steps:
- Enable VM acceleration on your machine.
- Launch Android Studio>Tools>Android>AVD Manager and select Create Virtual Device.
- Choose a device definition and select Next.
- Select one or more system images for the Android versions you want to emulate, and select Next. An x86 or x86_64 image is recommended.
- Under Emulated Performance, select Hardware – GLES 2.0 to enable hardware acceleration.
- Verify the AVD configuration is correct, and select Finish.
- In Android Virtual Device Manager, click Run in the toolbar. The emulator starts up and displays the default canvas for your selected OS version and device.
- Start your app by running a Flutter run. The connected device name is Android SDK built for, where the platform is the chip family, such as x86.
Open & Connect Device using Android Studio:
Android Studio shows a list of emulators/simulators (installed in your system) or devices (connected to your system). Just select a device, you want to open, from a list, and run the project.

Flutter config –android-sdk ANDROID_SDK_PATH
- Device Not Found (When setup Flutter in android studio)
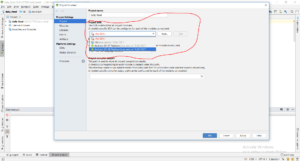
- Project structure -> select latest ANDROID API in Project SDK

Note:
- If you are using XCode, if both your computer and the device are using the same WIFI, you don’t have to connect the device with the computer.
- For Android, or iOS running under terminal command, if you are using the command line to run this, you have to make sure they are connected via cables. Sharing the same WIFI does not work. Make sure your device is really connected.
- Make sure you allowed USB Debugging on your android device.
If this still does not work, try to fire the below command, where you can get richer info and details:
flutter run --verbose
Sometimes you have everything perfect but the device is no longer authorized on ADB. In such cases you have ADB but It will not show you on connected devices.
Steps to Fix this issue
- Check if authorized: Open terminal/cmd/PowerShell and write adb devices it will show you all connected devices to PC.
<ANDROID_SDK_HOME>\platform-tools>adb devices
List of devices attached
4df798d76f98cf6d        unauthorized
- Revoke USB Debugging on phone: If the device is shown as unauthorized, go to the developer options on the phone and click “Revoke USB debugging authorization“
- Restart ADB Server:
adb kill-server
adb start-server
- Reconnect the device and run the following command again: ADB devices.
Now it should display authorized.
- Ready to go: Now, open your editor Android Studio/Visual Studio Code and check if your device is showing in connected devices or not.
You can simply check that with the Flutter Doctor command.
Add Flutter to Windows Environment variable Path
For window user,
Set environment variable of Flutter SDK(…\flutter_windows_v0.2.8-beta.zip\flutter\bin)
- Navigate in to Flutter SDK folder.
- Go inside to bin folder and copy the directory path (in your case C:\Flutter\bin)
- Go to “Control Panel > User Accounts > User Accounts > Change my environment variables”
- Under “User variables” select path variable and click edit.
- Put C:\Flutter\bin and apply.
Same as Flutter Environment, we have to set the Android SDK path if it is on custom location.
- Navigate into the Android SDK folder.
- Copy the directory path (in your case ..AndroidStudioSDK\sdk)
- Go to “Control Panel > User Accounts > User Accounts > Change my environment variables”
- Under “User variables” select path variable and click edit.
- Put ..AndroidStudioSDK\sdk with ANDROID_HOME and apply.
User can also try the below things:
- First, run Android Emulator
- Then go to your Flutter Console
- Run the command flutter doctor & check whether your emulator is showing under the connected devices tag e.g.

Now move to your Flutter project path via Flutter console e.g. for me it is D:\FlutterWorkspace\flutter_demo
Then run flutter run command. e.g.

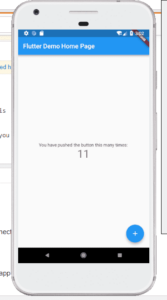
Wait for a few moments you will see your app running into Android Emulator.

Conclusion:
So in this article, we have been through How to Solve No Connected Devices in Flutter
Thanks for being with us on a Flutter Journey !!!
So Keep Learning!!! Keep fluttering!!!
FlutterAgency.com is our portal Platform dedicated to Flutter Technology and Flutter Developers. The portal is full of cool resources from Flutter like Flutter Widget Guide, Flutter Projects, Code libs and etc.
FlutterAgency.com is one of the most popular online portals dedicated to Flutter Technology and daily thousands of unique visitors come to this portal to enhance their knowledge of Flutter.
Contemporary ventures
Recent blog
ready to get started?
Fill out the form below and we will be in touch soon!
"*" indicates required fields


