How to Change Android Minsdkversion in Flutter App Development?
Including third-party software in your app may make things simpler for you and give you more time to concentrate on the aspects of your app that are most important to its success. However, if you install the packages, there is a possibility that you may run into a problem that requires you to raise the Android minimum SDK version.
This occurs as a result of the fact that the plugin needs a higher android sdk version for projects that were built both before and after the Flutter 2.8 release. Therefore, the purpose of this article is to demonstrate how to modify the Android minimum SDK version in the best flutter app development.
Changes that Can Be Made to the Android minimum SDK Version in Flutter
You may alter the Android minimum required SDK version in one of two methods. The first one applies to projects that were started before the Flutter 2.8 release, while the second one applies to projects that were started after the Flutter 2.8 upgrade. Many companies like Google Pay, Alibaba Group, BMW & Tencent are now using Flutter technology for their mobile application. An experienced Flutter developer is the right choice for your organization if you want a seamless mobile application for your business.
For Projects That Were Created Prior to the Release of the Flutter 2.8 Update,you must explicitly make modifications inside the build.gradle file in order to adjust the minSdkVersion setting in Flutter for projects that were built before the 2.8 upgrade.
Steps:
Step 1:
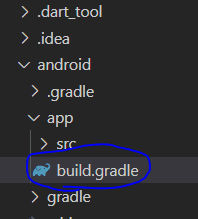
Navigate to the project folder/android/app/build.gradle folder and open the build.gradle file there.
Step 2:
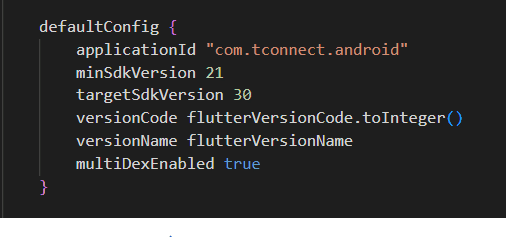
Navigate to the defaultConfig section and change the minSdkVersion value to the most recent available version.
Step 3:
Once you are inside the terminal, execute the command to clear flutter.
Step 4:
Re-run your app.
Code example
defaultConfig {
   applicationId "com.example.common_project"
   minSdkVersion 21 // <-- SEE HERE
   targetSdkVersion 30
   versionCode flutterVersionCode.toInteger()
   versionName flutterVersionName
}
For Projects That Have Been Created Since the Flutter 2.8 Update
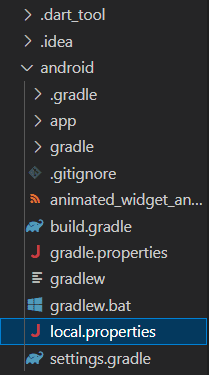
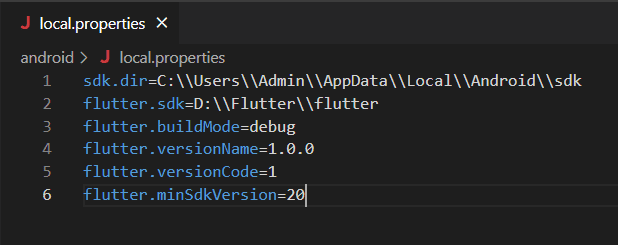
If you want to alter the Android minimum SDK version for a Flutter project that was created after the 2.8 release, you will need to make changes in the local.properties file and then reference the new variable that you made in the local.properties file inside the build.gradle file.
Steps:
Step 1:
Find the file named local.properties in the project folder that is labeled android and look for it there.
Step 2:
Insert the line marked flutter into the local.properties file on your computer. minSdkVersion=21
Step 3:
Open the build.gradle file that can be found in the project folder/android/app/build.gradle directory at this point.
Step 4:
The fourth step is to locate the defaultConfig section and then change the localProperties with the minSdkVersion.
getProperty(‘flutter.minSdkVersion’).toInteger().
Step 5:
Once you are inside the terminal, execute the command to clear flutter.
Step 6:
Give your application another try.
Code example
Under local.properties file
sdk.dir=/Users/Admin/Library/Android/sdk
flutter.sdk=/Users/Admin/Data/Development/flutter
flutter.buildMode=debug
flutter.versionName=1.0.0
flutter.versionCode=1
flutter.minSdkVersion=20  #new
Under build.gradle file
defaultConfig {
    // TODO: Specify your own unique Application ID (https://developer.android.com/studio/build/application-id.html).
    applicationId "com.example.sample_project"
    minSdkVersion localProperties.getProperty('flutter.minSdkVersion').toInteger()
    targetSdkVersion flutter.targetSdkVersion
    versionCode flutterVersionCode.toInteger()
    versionName flutterVersionName
}

Conclusion
Throughout this guide, we went through the steps required to alter the Android minimum SDK version in Flutter using illustrative examples. For projects made both before and after the Flutter 2.8 upgrade, we investigated both of the available methods for updating the SDK version on Android. Keep visiting www.flutteragency.com for more such informative articles.
Contemporary ventures
Recent blog
ready to get started?
Fill out the form below and we will be in touch soon!
"*" indicates required fields

