RefreshIndicator Widget – Flutter Widget Guide By Flutter Agency
You might have seen it in a lot of mobile application provides a feature to swipe or pull down to refresh its content. When you swipe from top to bottom of the screen. After that, a loader will be shown and will disappear once the new content is loaded. In Flutter, the same things can be achieved by using RefreshIndicator Widget.
What is RefreshIndicator Widget in Flutter?
Flutter SDK providing us RefreshIndicator Widget to apply a pull to refresh on any screen. To apply a pull to refresh on any screen, we have to wrap the root widget of the screen inside of RefreshIndicator Widget.
The Constructor for RefreshIndicator Widget will look like below :
  const RefreshIndicator(
{Key? key,
required Widget child,
double displacement = 40.0,
double edgeOffset = 0.0,
required RefreshCallback onRefresh,
Color? color,
Color? backgroundColor,
ScrollNotificationPredicate notificationPredicate = defaultScrollNotificationPredicate,
String? semanticsLabel,
String? semanticsValue,
double strokeWidth = RefreshProgressIndicator.defaultStrokeWidth,
RefreshIndicatorTriggerMode triggerMode = RefreshIndicatorTriggerMode.onEdge}
)
In the above Constructor, all fields marked with @required must not be empty. the code snippet will look like below :
RefreshIndicator(
             key: refreshKey,
             child:Container(),
		   onRefresh:(){},
)
When the user swipes down to refresh the data, the onRefresh callback property is been called. The callback is expected to update the scrollable’s contents and then complete the Future it returns.
Let’s implement an example for the same as below :
Variable and method :
var refreshkey = GlobalKey<RefreshIndicatorState>();
var list;
var random;
- GlobalKey: A key that is unique across the entire app.
- list: a list that holds an array of list data.
- random: which holds the random number 0 – 10 using the Random() method.
create a refreshlist() is a Future async function that refresh the list data, we need to user Future function because onRefresh property of RefreshIndicator accepts a Future. Code Snippet will look like below :
  Future<Null> refreshlist() async {
    refreshkey.currentState?.show(
      atTop: false,
    );
    await Future.delayed(
      Duration(seconds: 2),
    ); //wait here for 2 second
    setState(() {
      list = List.generate(
        random.nextInt(10),
        (i) => " Item $i",
      );
    });
  }
- initState() :
@override
  void initState() {
    super.initState();
    random = Random();
    refreshlist();
  }
when users pull down to refresh the list is been re-generate again with new data.
- ListView widget will look like below:
ListView.builder(
                itemCount: list?.length,
                itemBuilder: (context, i) => SizedBox(
                  height: 80.0,
                  child: Card(
                    color: Colors.orange,
                    child: Center(
                        child: Text(
                      list[i], // array list
                      style: TextStyle(
                        fontSize: 15.0,
                        color: Colors.white,
                        fontWeight: FontWeight.w600,
                      ),
                    )),
                  ),
                ),
              ),
Let’s wrap it with RefreshIndicator Widget like below :
 Expanded(

            child: RefreshIndicator(
              key: refreshkey,
              child: ListView.builder(
                itemCount: list?.length,
                itemBuilder: (context, i) => SizedBox(
                  height: 80.0,
                  child: Card(
                    color: Colors.orange,
                    child: Center(
                        child: Text(
                      list[i], // array list
                      style: TextStyle(
                        fontSize: 15.0,
                        color: Colors.white,
                        fontWeight: FontWeight.w600,
                      ),
                    )),
                  ),
                ),
              ),
              onRefresh: refreshlist,
            ),
          ),
How to use RefreshIndicator Widget in Flutter?
The following code snippet tells us how to implement RefreshIndicator in Flutter.
_RefreshIndicatorWidgetState(); } class _RefreshIndicatorWidgetState extends State{ var refreshkey = GlobalKey (); var list; var random; @override void initState() { super.initState(); random = Random(); list = List.generate( random.nextInt(10), (i) => " Item $i", ); } @override Widget build(BuildContext context) { return Scaffold( body: Column( children: [ Expanded( child: RefreshIndicator( key: refreshkey, onRefresh: refreshlist, child: ListView.builder( itemCount: list?.length, itemBuilder: (context, i) => SizedBox( height: 80.0, child: Card( color: Colors.orange, child: Center( child: Text( list[i], style: const TextStyle( fontSize: 15.0, color: Colors.white, fontWeight: FontWeight.w600, ), )), ), ), ), ), ), const Text( "Swipe Down to Refresh List", style: TextStyle(fontSize: 25.0), ), const SizedBox( height: 25.0, ) ], ), ); } Future refreshlist() async { refreshkey.currentState?.show( atTop: false, ); await Future.delayed( const Duration(seconds: 2), ); setState(() { list = List.generate( random.nextInt(10), (i) => " Item $i", ); }); } }
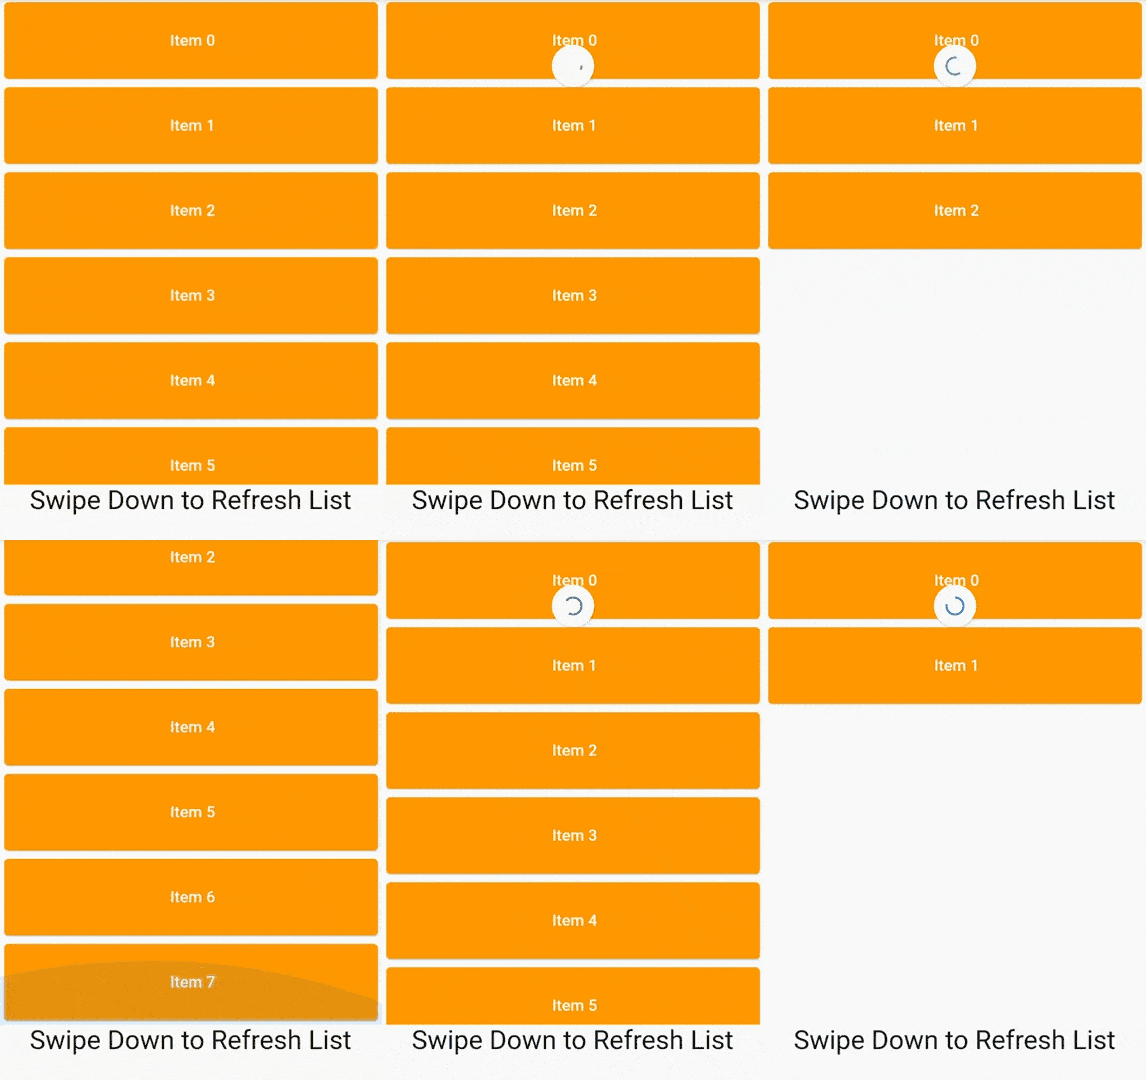
Our output will look like below :
RefreshIndicator
Conclusion:
In this article, we have been through What is RefreshIndicator Widget in Flutter along with how to implement it in a Flutter.
Thanks for reading !!!
FlutterAgency.com is our portal Platform dedicated to Flutter Technology and Flutter Developers. The portal is full of cool resources from Flutter like Flutter Widget Guide, Flutter Projects, Code libs and etc.
FlutterAgency.com is one of the most popular online portal dedicated to Flutter Technology and daily thousands of unique visitors come to this portal to enhance their knowledge on Flutter.
Contemporary ventures
Recent blog
ready to get started?
Fill out the form below and we will be in touch soon!
"*" indicates required fields


