Expanded Widget – Flutter Widget Guide By Flutter Agency
What is Expanded Widget?
Expanded Widget is a widget that expands a child of a Row Widget, Column Widget, or Flex so that the child fills the available space.
Why we need Expanded Widget ?
When a user wants to fill between widgets user can make use of this widget. For example, when you are working with Row Widget or Column Widget and using MainAxisAlignment.spaceBetween. It will leave a gap between children so, in order to fill the available space, we need it.
It will take over the dimension of a child along with the main axis of either Column Widget or Row Widget but the cross axis of the child not affected. For the column main axis is vertical and for the row main axis is horizontal.
It has two important parameters.
- Flex
- Child
Flex: Flex parameter used to so that the expansion of widgets can be made controllable.
Child: Child parameter is used to hold another widget and when multiple children are expanded, the available space is divided using the Flex factor.
Expanded with Column Widget
Consider Column Widget as having three children as a Container Widget so our code snippet will look like below :
 Column(
      mainAxisAlignment: MainAxisAlignment.spaceBetween,
      crossAxisAlignment: CrossAxisAlignment.start,
      children: <Widget>[
        Container(
          padding: EdgeInsets.all(20.0),
          child: Text(
            "1",
            style: TextStyle(
              color: Colors.white,
            ),
          ),
          color: Colors.indigo,
        ),
        Container(
          padding: EdgeInsets.all(20.0),
          child: Text(
            "This is Expanded",
            style: TextStyle(
              color: Colors.white,
            ),
          ),
          color: Colors.purple,
        ),
        Container(
          padding: EdgeInsets.all(20.0),
          child: Text(
            "2",
            style: TextStyle(
              color: Colors.white,
            ),
          ),
          color: Colors.indigo,
        ),
      ],
    );
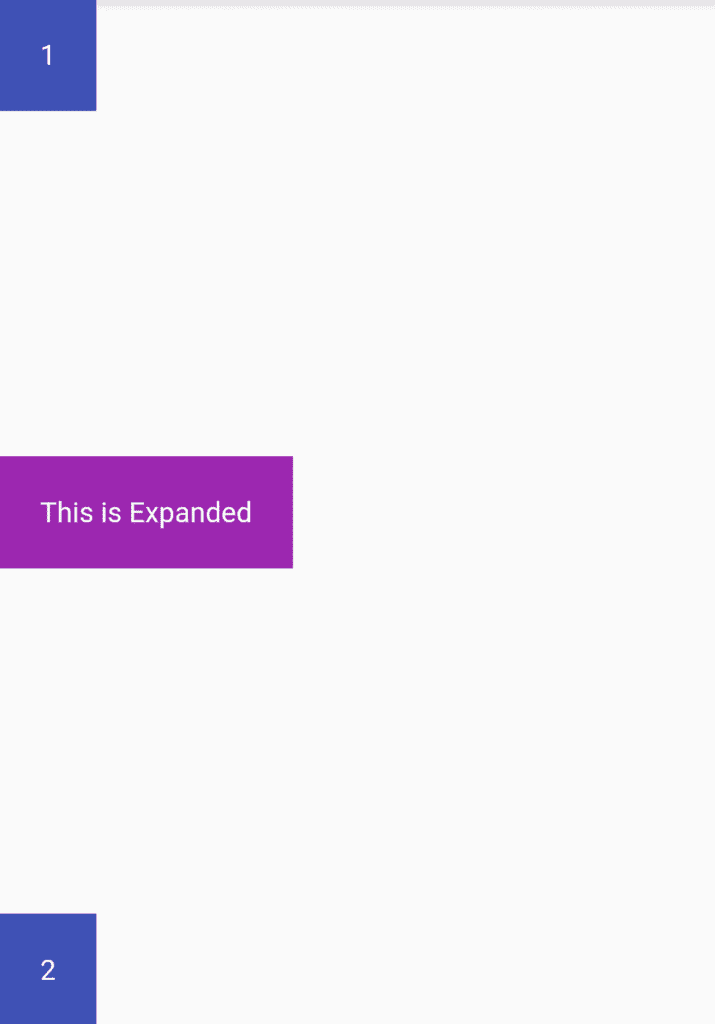
Above code will generate output as below :
without Expanded in a Column widget
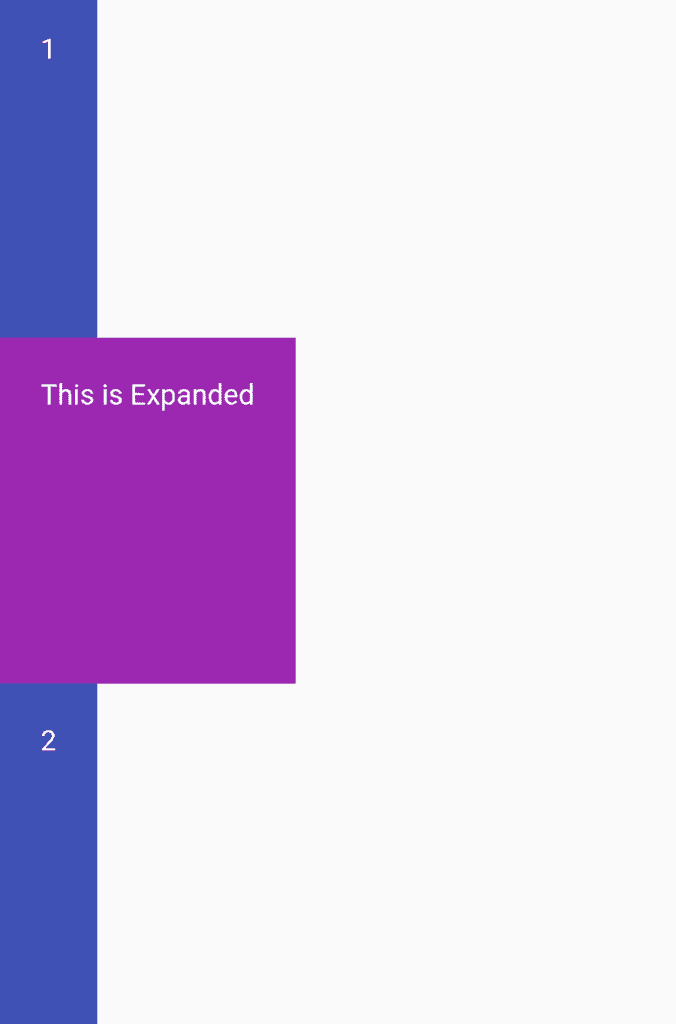
Let’s wrap Container Widget with it so our code snippet will look like below :
 Column(
      mainAxisAlignment: MainAxisAlignment.spaceBetween,
      crossAxisAlignment: CrossAxisAlignment.start,
      children: <Widget>[
        Expanded(
          child: Container(
            padding: EdgeInsets.all(20.0),
            child: Text(
              "1",
              style: TextStyle(
                color: Colors.white,
              ),
            ),
            color: Colors.indigo,
          ),
        ),
        Expanded(
          child: Container(
            padding: EdgeInsets.all(20.0),
            child: Text(
              "This is Expanded",
              style: TextStyle(
                color: Colors.white,
              ),
            ),
            color: Colors.purple,
          ),
        ),
        Expanded(
            child: Container(
              padding: EdgeInsets.all(20.0),
              child: Text(
                "2",
                style: TextStyle(
                  color: Colors.white,
                ),
              ),
              color: Colors.indigo,
            )),
      ],
    );
with Expanded
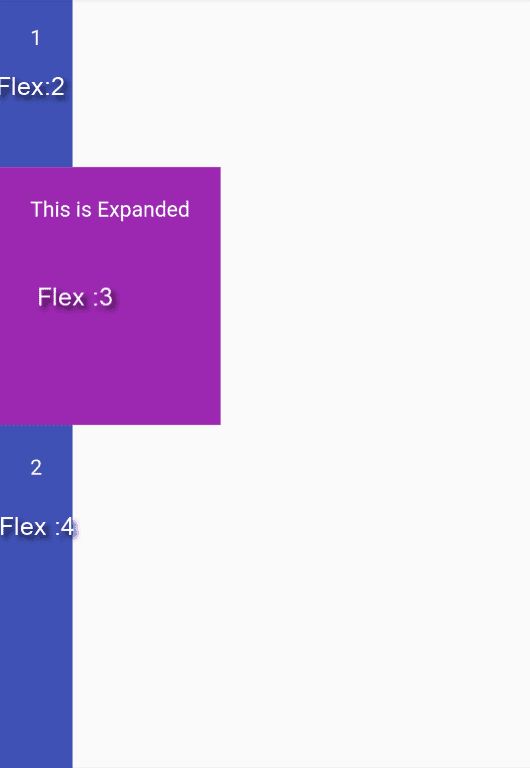
Our code snippet will look like below :
 Column(
      mainAxisAlignment: MainAxisAlignment.spaceBetween,
      crossAxisAlignment: CrossAxisAlignment.start,
      children: <Widget>[
        Expanded(
          flex: 2,
          child: Container(
            padding: EdgeInsets.all(20.0),
            child: Text(
              "1",
              style: TextStyle(
                color: Colors.white,
              ),
            ),
            color: Colors.indigo,
          ),
        ),
        Expanded(
          flex: 3,
          child: Container(
            padding: EdgeInsets.all(20.0),
            child: Text(
              "This is Expanded",
              style: TextStyle(
                color: Colors.white,
              ),
            ),
            color: Colors.purple,
          ),
        ),
        Expanded(
            flex: 4,
            child: Container(
              padding: EdgeInsets.all(20.0),
              child: Text(
                "2",
                style: TextStyle(
                  color: Colors.white,
                ),
              ),
              color: Colors.indigo,
            )),
      ],
    );
We will output like below :
Expanded width with Flex
Expanded with Row Widget
Take a simple example of Row Widget having three children as Container Widget.
Code Snippet :
Row(
      mainAxisAlignment: MainAxisAlignment.spaceBetween,
      children: <Widget>[
        Container(
          padding: EdgeInsets.all(20.0),
          child: Text(
            "1",
            style: TextStyle(
              color: Colors.white,
            ),
          ),
          color: Colors.indigo,
        ),
        Container(
          padding: EdgeInsets.all(20.0),
          child: Text(
            "This is Expanded",
            style: TextStyle(
              color: Colors.white,
            ),
          ),
          color: Colors.purple,
        ),
        Container(
          padding: EdgeInsets.all(20.0),
          child: Text(
            "2",
            style: TextStyle(
              color: Colors.white,
            ),
          ),
          color: Colors.indigo,
        ),
      ],
    );
Our output will look like below :
without Expanded
Our final code snippet will look like below :
Row(
      mainAxisAlignment: MainAxisAlignment.spaceBetween,
      children: <Widget>[
        Expanded(
          child: Container(
            padding: EdgeInsets.all(20.0),
            child: Text(
              "1",
              style: TextStyle(
                color: Colors.white,
              ),
            ),
            color: Colors.indigo,
          ),
        ),
        Expanded(
          child: Container(
            padding: EdgeInsets.all(20.0),
            child: Text(
              "This is Expanded",
              style: TextStyle(
                color: Colors.white,
              ),
            ),
            color: Colors.purple,
          ),
        ),
        Expanded(
          child: Container(
            padding: EdgeInsets.all(20.0),
            child: Text(
              "2",
              style: TextStyle(
                color: Colors.white,
              ),
            ),
            color: Colors.indigo,
          ),
        ),
      ],
    );
with Expanded
 Row(
      mainAxisAlignment: MainAxisAlignment.spaceBetween,
      children: <Widget>[
        Expanded(
          flex: 2,
          child: Container(
            padding: EdgeInsets.all(20.0),
            child: Text(
              "1",
              style: TextStyle(
                color: Colors.white,
              ),
            ),
            color: Colors.indigo,
          ),
        ),
        Expanded(
          flex: 3,
          child: Container(
            padding: EdgeInsets.all(20.0),
            child: Text(
              "This is Expanded",
              style: TextStyle(
                color: Colors.white,
              ),
            ),
            color: Colors.purple,
          ),
        ),
        Expanded(
          flex: 4,
          child: Container(
            padding: EdgeInsets.all(20.0),
            child: Text(
              "2",
              style: TextStyle(
                color: Colors.white,
              ),
            ),
            color: Colors.indigo,
          ),
        ),
      ],
    );
Above code will generate output as below :
with Expanded and flex
Key Notes :
- It has to be a child of a Flex widget otherwise the app will crash. Row widget and Column widget are both extend Flex widget so they count.
- If Row widget or Column widget has unbound size on its MainAxis then using it will cause problems.
Thanks for being with us !!!
FlutterAgency serves as a premier online hub specifically tailored for Flutter technology and its developer community. This platform is rich in resources for Flutter enthusiasts, offering a comprehensive Flutter Widget Guide, a variety of Flutter Projects, an array of Code Libraries, and more.
Recognized as a leading destination for those interested in Flutter, FlutterAgency attracts thousands of unique visitors daily who are eager to expand their understanding and skills in Flutter technology.
Contemporary ventures
Recent blog
ready to get started?
Fill out the form below and we will be in touch soon!
"*" indicates required fields


