CustomPaint Widget – Flutter Widget Guide By Flutter Agency
What is CustomPaint Widget?
CustomPaint Widget gives you access to low-level graphics.
Working on custom designs might be very time consuming and complex in native Android and iOS development. Forget these painful days, as in Flutter, the CustomPaint Widget combined with Flutter’s Hot Reload helps you to iterate upon your creations quickly and efficiently.
The Constructor will look like below :
CustomPaint CustomPaint({
  Key? key,
  CustomPainter? painter,
  CustomPainter? foregroundPainter,
  Size size = Size.zero,
  bool isComplex = false,
  bool willChange = false,
  Widget? child,
})
In Above Constructor all fields marked with @required must not be empty.
We will make use of CustomPaint Widget which allows us to draw things on the screen by making use of a CustomPainter object.
CustomPaint(
  painter: ShapePainter(),
  child: Container(),
  ....
)
- painter: The painter that paints before the child.
- foregroundPainter: The painter that paints after the child.
- child: By default, the canvas will take the size of the child, if it is defined.
- size: If the child is not defined, then the size of the canvas should be specified.
As the ShapePainter class extends from CustomPainter, which is an abstract class, two methods must be implemented within it:
- paint: This method is called whenever the object needs to be repainted.
- shouldRepaint: This method is called when a new instance of the class is provided.
How to use CustomPaint Widget in Flutter?
The following code snippet tells us how to implement CustomPaint Widget in Flutter.
class ShapePainter extends CustomPainter {
  @override
  void paint(Canvas canvas, Size size) {
    // TODO: implement paint
  }

  @override
  bool shouldRepaint(CustomPainter oldDelegate) {
    // TODO: implement shouldRepaint
    return null;
  }
}
The paint method has two parameters :
- canvas
- size
If we have a child specified inside the CustomPaint Widget, then the canvas will have the same size as that child. In our case, the canvas area will take the size of the entire Container.
Canvas: Canvas is used to draw anything on it. An interface for recording graphical operations.
The code for drawing the line is given below:
class ShapePainter extends CustomPainter {
  @override
  void paint(Canvas canvas, Size size) {
    var paint = Paint()
      ..color = Colors.teal
      ..strokeWidth = 5
      ..strokeCap = StrokeCap.round;

    Offset startingPoint = Offset(0, size.height / 2);
    Offset endingPoint = Offset(size.width, size.height / 2);

    canvas.drawLine(startingPoint, endingPoint, paint);
  }

  @override
  bool shouldRepaint(CustomPainter oldDelegate) {
    return false;
  }
}
There are two Offset variables that specify the starting and ending position coordinates.
Finally, the drawLine method is called on the canvas for drawing a line between the two Offset positions, and the paint variable is also passed to this method.
You can return false in the shouldRepaint method because there is no need to redraw the line.
There is also another method you can follow for drawing a line using Path.
class ShapePainter extends CustomPainter {
  @override
  void paint(Canvas canvas, Size size) {
    var paint = Paint()
      ..color = Colors.teal
      ..strokeWidth = 5
      ..style = PaintingStyle.stroke
      ..strokeCap = StrokeCap.round;

    var path = Path();
    path.moveTo(0, size.height / 2);
    path.lineTo(size.width, size.height / 2);
    canvas.drawPath(path, paint);
  }
  @override
  bool shouldRepaint(CustomPainter oldDelegate) {
    return false;
  }
}
While using Path, you will need to specify another property for the paint variable, that being style. If you do not specify this property, then the drawn line will not be visible.
The moveTo method is used for changing the current location of the point to the specified coordinate.
The lineTo method is used for drawing a line from the current point to the specified point on the canvas.
Then the drawPath method is called on the canvas for applying the paint to the path and displaying it on screen.
Draw Circle :
User can draw a simple circle with the center at (size.width/2, size.height/2), i.e. at the center the Container Widget, by either using the drawCircle method on the canvas or by using Path.
The code for drawing a circle using the drawCircle method is given below :
class ShapePainter extends CustomPainter {
  @override
  void paint(Canvas canvas, Size size) {
    var paint = Paint()
      ..color = Colors.teal
      ..strokeWidth = 5
      ..style = PaintingStyle.stroke
      ..strokeCap = StrokeCap.round;

    Offset center = Offset(size.width / 2, size.height / 2);

    canvas.drawCircle(center, 100, paint);
  }
  @override
  bool shouldRepaint(CustomPainter oldDelegate) {
    return false;
  }
}
The drawCircle method takes the coordinates for the center of the circle, its radius, and the painted object as the arguments for drawing a circle.
Draw Polygons
The best method for drawing polygons is to use a circle as the reference and calculate the coordinates according to the angles, which can be determined by applying basic trigonometry.
Below is the code snippet for drawing a square :
class PolygonPainter extends CustomPainter {
  final int sides;
  final double radius;

  PolygonPainter({required this.sides, required this.radius});

  @override
  void paint(Canvas canvas, Size size) {
    var paint = Paint()
      ..color = Colors.blue
      ..style = PaintingStyle.stroke
      ..strokeWidth = 3;

    var path = Path();
    var angle = (math.pi * 2) / sides;

    Offset center = Offset(size.width / 2, size.height / 2);

    Offset startPoint = Offset(radius * math.cos(0.0), radius * math.sin(0.0));

    path.moveTo(startPoint.dx + center.dx, startPoint.dy + center.dy);

    for (int i = 1; i <= sides; i++) {
      double x = radius * math.cos(angle * i) + center.dx;
      double y = radius * math.sin(angle * i) + center.dy;
      path.lineTo(x, y);
    }
    path.close();

    canvas.drawPath(path, paint);
  }

  @override
  bool shouldRepaint(covariant CustomPainter oldDelegate) => false;
}
Adding Animations :
Just follow the steps below for animating the rotation of the polygon :
First of all, convert the MyPainter Widget to a StatefulWidget, and extend it from TickerProviderStateMixin, which helps in applying an animation.
Define two variables, animation, and controller :
Animation<double> animation;
AnimationController controller;
An infinite rotation can be achieved by applying a Tween from -π to π :
Tween<double> _rotationTween = Tween(begin: -math.pi, end: math.pi);
Initialize the controller and the animation variable inside the initState() method. For an infinite rotation, you can just repeat the animation as soon as it is complete. Controller.forward() is used to start the animation.
import 'dart:math' as math;
import 'package:flutter/material.dart';

void main() => runApp(const MyApp());

class MyApp extends StatelessWidget {
  const MyApp({Key? key}) : super(key: key);

  @override
  Widget build(BuildContext context) {
    return MaterialApp(
      home: Scaffold(
        appBar: AppBar(
          title: const Text('Animated Polygon Drawing'),
        ),
        body: const Center(
          child: AnimatedCustomPolygon(sides: 6, radius: 100),
        ),
      ),
    );
  }
}

class AnimatedCustomPolygon extends StatefulWidget {
  final int sides;
  final double radius;

  const AnimatedCustomPolygon({Key? key, required this.sides, required this.radius}) : super(key: key);

  @override
  _AnimatedCustomPolygonState createState() => _AnimatedCustomPolygonState();
}

class _AnimatedCustomPolygonState extends State with SingleTickerProviderStateMixin {
  late final AnimationController controller;
  late final Animation animation;

  @override
  void initState() {
    super.initState();

    controller = AnimationController(
      vsync: this,
      duration: const Duration(seconds: 4),
    );

    animation = Tween(begin: 0.0, end: 2 * math.pi).animate(controller)
      ..addListener(() {
        setState(() {});
      })
      ..addStatusListener((status) {
        if (status == AnimationStatus.completed) {
          controller.repeat();
        } else if (status == AnimationStatus.dismissed) {
          controller.forward();
        }
      });

    controller.forward();
  }

  @override
  void dispose() {
    controller.dispose();
    super.dispose();
  }

  @override
  Widget build(BuildContext context) {
    return Transform.rotate(
      angle: animation.value,
      child: CustomPaint(
        size: Size(widget.radius * 2, widget.radius * 2),
        painter: PolygonPainter(sides: widget.sides, radius: widget.radius),
      ),
    );
  }
}

class PolygonPainter extends CustomPainter {
  final int sides;
  final double radius;

  PolygonPainter({required this.sides, required this.radius});

  @override
  void paint(Canvas canvas, Size size) {
    var paint = Paint()
      ..color = Colors.blue
      ..style = PaintingStyle.stroke
      ..strokeWidth = 3;

    var path = Path();
    var angle = (math.pi * 2) / sides;
    var center = Offset(size.width / 2, size.height / 2);
    var startPoint = Offset(radius * math.cos(0.0), radius * math.sin(0.0));

    path.moveTo(startPoint.dx + center.dx, startPoint.dy + center.dy);

    for (int i = 1; i <= sides; i++) {
      double x = radius * math.cos(angle * i) + center.dx;
      double y = radius * math.sin(angle * i) + center.dy;
      path.lineTo(x, y);
    }

    path.close();
    canvas.drawPath(path, paint);
  }

  @override
  bool shouldRepaint(covariant CustomPainter oldDelegate) => false;
}
Then just pass the animation value in place of the radians to get the animation effect.
ShapePainter(_sides, _radius, animation.value)
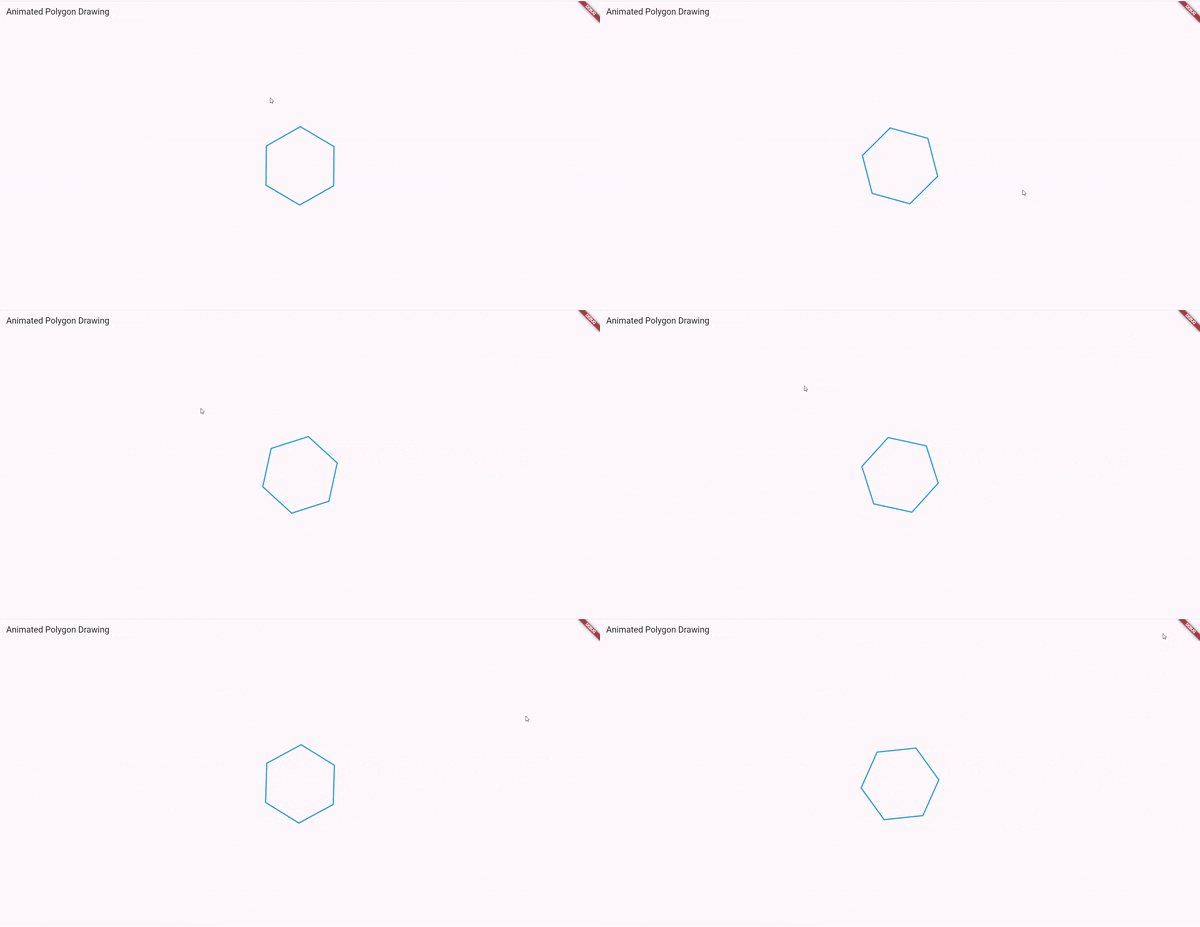
After applying this, you will get an animation like below :
Custom Paint
Conclusion:
In this article, we have been through What is CustomPaint Widget in Flutter along with how to implement it in a Flutter.
Thanks for reading !!!
Do let us know your valuable feedback to serve you better.
Contemporary ventures
Recent blog
ready to get started?
Fill out the form below and we will be in touch soon!
"*" indicates required fields


