How to Use CupertinoPageRoute and Named Routes In Flutter?
Earlier, we have gone through CupertinoPageScaffold Widget Which is used to provides you the structure to your iOS application page layout, targeting your iOS design. So in this article, we will discuss how to use CupertinoPageRoute and Named Routes in Flutter.
Are you as excited as us to explore the same? So Let’s start.
How to Use CupertinoPageRoute and Named Routes In Flutter?
Use onGenerate of MaterialApp / CupertinoApp to use custom routes. For example CupertinoPageRoute. So If you are already using the Cupertino-Style consider using CupertinoApp, which automatically uses the CupertinoPageRoute.
- Using MaterialApp
If you want to keep the MaterialApp as your root widget. So you’ll have to replace the routes attribute of your MaterialApp with an onGenerate implementation.
Original:
routes: {
  '/': (_) => HomePage(),
  'deeper': (_) => DeeperPage(),
}
Changed with onGenerate:
onGenerateRoute: (RouteSettings settings) {
  switch (settings.name) {
    case '/':
      return CupertinoPageRoute(
          builder: (_) => HomePage(), settings: settings);
    case 'deeper':
      return CupertinoPageRoute(
          builder: (_) => DeeperPage(), settings: settings);
  }
}
Now onGenerate handles the routing manually. So it uses CupertinoPageRoute for each route. This replaces the complete routes: {…} structure.
Consider a code snippet like the below:
import 'package:flutter/material.dart';
import 'package:flutter/cupertino.dart';

void main() => runApp(MyApp());

class MyApp extends StatelessWidget {
  @override
  Widget build(BuildContext context) {
    return MaterialApp(
      onGenerateRoute: (RouteSettings settings) {
        switch (settings.name) {
          case '/':
            return CupertinoPageRoute(
                builder: (_) => HomePage(), settings: settings);
          case 'deeper':
            return CupertinoPageRoute(
                builder: (_) => DeeperPage(), settings: settings);
        }
      },
    );
  }
}

class HomePage extends StatelessWidget {
  @override
  Widget build(BuildContext context) {
    return Scaffold(
      appBar: AppBar(
        title: Text('Material!'),
      ),
      body: Center(
        child: RaisedButton(
          child: Text('Take me deeper!'),
          onPressed: () => Navigator.pushNamed(context, 'deeper'),
        ),
      ),
    );
  }
}

class DeeperPage extends StatelessWidget {
  @override
  Widget build(BuildContext context) {
    return Scaffold(
      appBar: AppBar(
        title: Text('Material!'),
      ),
      body: Column(
        crossAxisAlignment: CrossAxisAlignment.center,
        mainAxisAlignment: MainAxisAlignment.spaceAround,
        children: [
          RaisedButton(
            child: Text('Home :)'),
            onPressed: () =>
                Navigator.popUntil(context, ModalRoute.withName('/')),
          ),
          RaisedButton(
            child: Text('Deeper!'),
            onPressed: () => Navigator.pushNamed(context, 'deeper'),
          ),
        ],
      ),
    );
  }
}
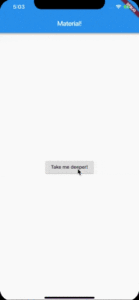
So we will get output like the below:

- Cupertino Style
You can use the CupertinoApp widget instead of the MaterialApp Widget. So then the default chosen navigation will always use the CupertinoPageRoute.
We will get output like the below:

Conclusion:
Thanks for being with us on a Flutter Journey !!! Stay Connected!!!
So in this article, we got to learn how to use CupertinoPageRoute and Named Routes in Flutter.
Let us know if you need any further assistance in Flutter Development!! We would love to assist you 🙂
Drop us your flutter requirement to serve you better. We are here for you.
Flutter Agency is our portal Platform dedicated to Flutter Technology and Flutter Developers. The portal is full of cool resources from Flutter like Flutter Widget Guide, Flutter Projects, Code libs and etc.
Flutter Agency is one of the most popular online portals dedicated to Flutter Technology and daily thousands of unique visitors come to this portal to enhance their knowledge on Flutter.
Contemporary ventures
Recent blog
ready to get started?
Fill out the form below and we will be in touch soon!
"*" indicates required fields


