Flexible Widget – Flutter Widget Guide By Flutter Agency
What is Flexible Widget?
Flexible Widget is a widget that controls how a child of a Row widget, Column widget, or Flex flexes.
A Flexible Widget must have a parent widget as a Row widget, Column widget, or Flex widget, and the path from it to its enclosing Row, column, or Flex widget must contain only Stateless widgets or Stateful widgets.
The Flexible Widget gives a child of a Row, Column, or Flex the flexibility to expand to fill the available space in the main axis (e.g., horizontally for a Row or vertically for a Column)
The constructor of it will look like below :
Flexible({
Key key,
int flex: 1,
FlexFit fit: FlexFit.loose,
@required Widget child,
})
Properties :
fit: How a flexible child is inscribed into the available space.
flex : If flex is non-zero, the fit determines whether the child fills the space the parent makes available during layout. If the fit is FlexFit.tight, the child is required to fill the available space. If the fit is FlexFit.loose, the child can be at most as large as the available space
The use of a Flexible widget is easy. Wrap each child in the Row widget or Column widget into Flexible and give it a flex value.
The addition of all the flex values determines how much space each Flexible will use. So, in our example as below, the first child takes up a third of the column, the second takes up a half, and the final takes up 1/6.
You can also specify how strict its sizing should be by specifying a fit property, which can value either loose or tight.
-
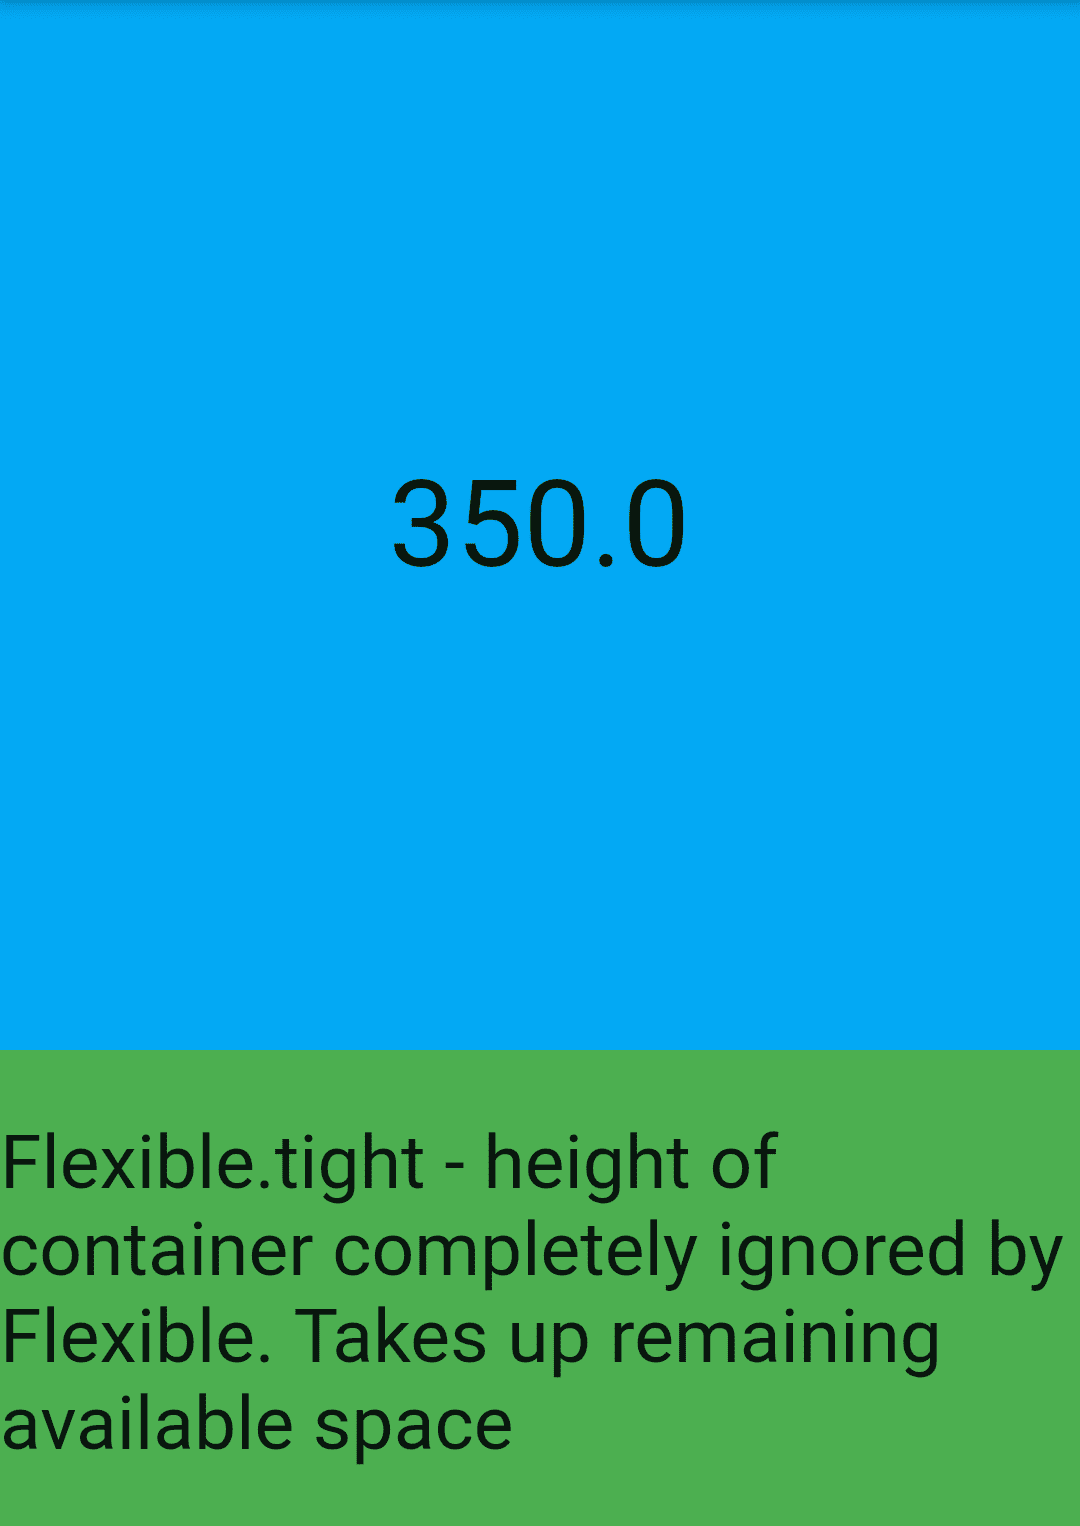
FlexFix.tight Example :
Widget build(BuildContext context) {
return Scaffold(
body: Column(
mainAxisAlignment: MainAxisAlignment.spaceBetween,
children: [
Container(
color: Colors.lightBlue,
height: 350,
width: double.infinity,
child: Center(
child: Text(
'350',
style: TextStyle(fontSize: 40.0),
))),
Flexible(
fit: FlexFit.tight,
child: Container(
color: Colors.green,
height: 150,
width: double.infinity,
child: Center(
child: Text(
'Flexible.tight - height of container completely ignored by Flexible.',
style: TextStyle(fontSize: 25.0),
))),
),
],
),
);
}
Above code will give us output like below :
FlexFit.tight
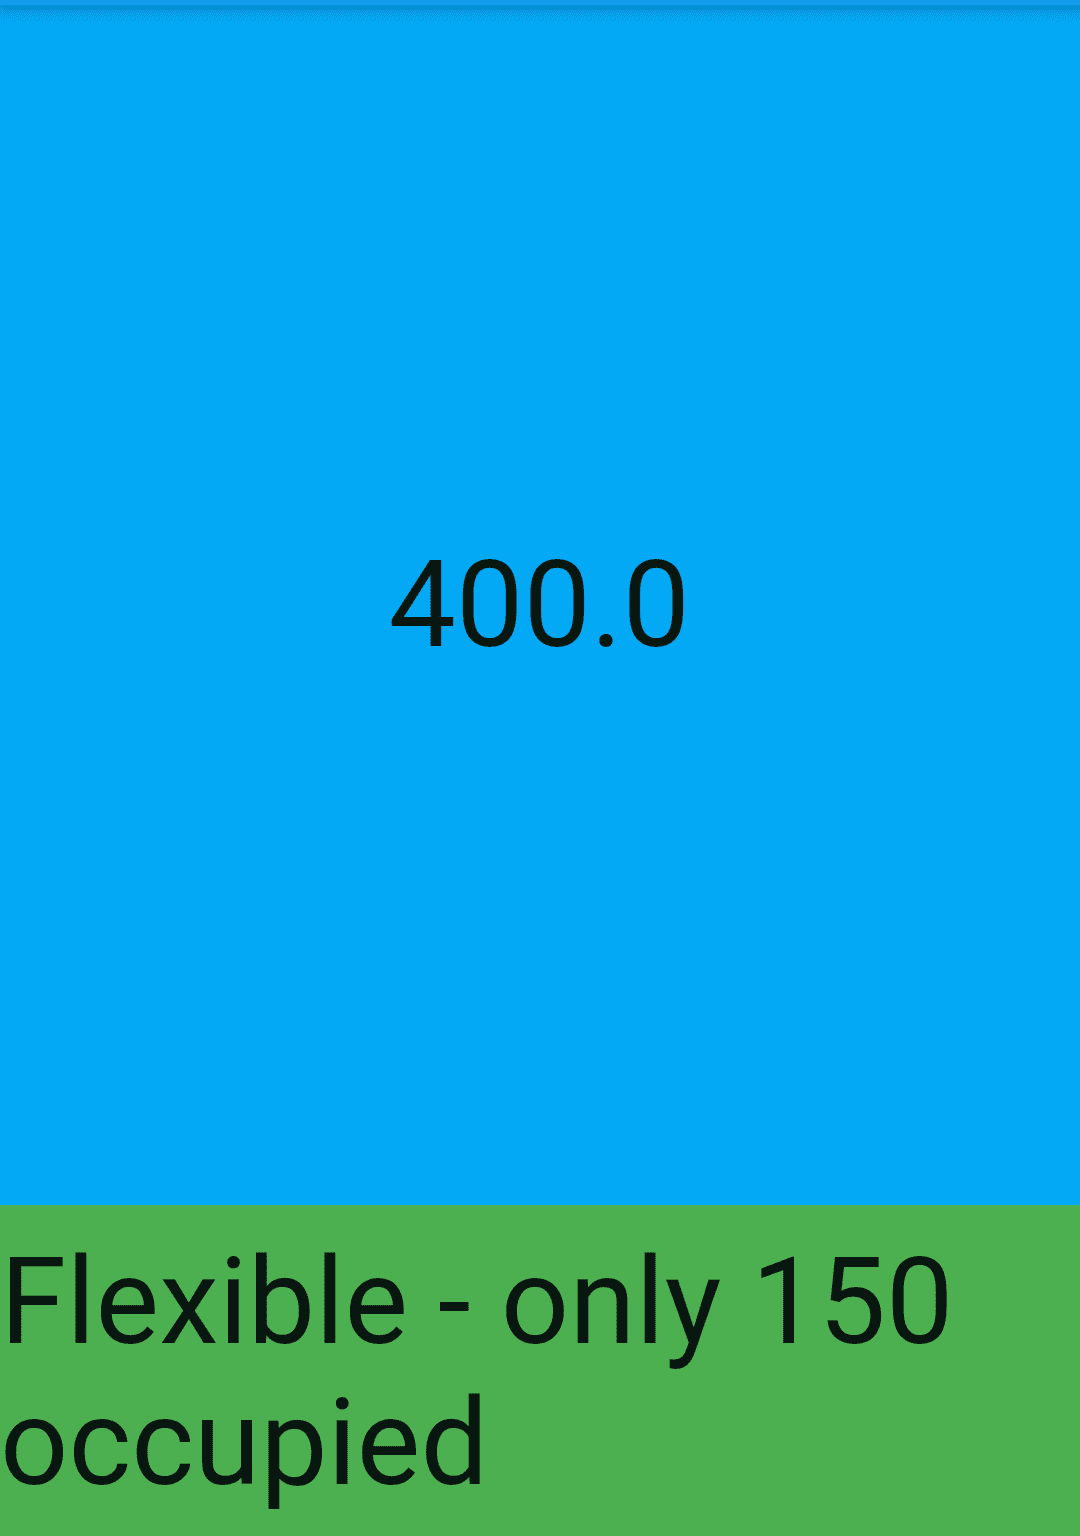
2.FlexFit.loose Example :
Widget build(BuildContext context) {
return Scaffold(
body: Column(
mainAxisAlignment: MainAxisAlignment.spaceBetween,
children: [
Container(
color: Colors.lightBlue,
height: 400,
width: double.infinity,
child: Center(
child: Text(
'400',
style: TextStyle(fontSize: 40.0),
))),
Flexible(
fit: FlexFit.loose,
child: Container(
color: Colors.green,
height: 150,
width: double.infinity,
child: Center(
child: Text(
'Flexible - only 150 occupied',
style: TextStyle(fontSize: 40.0),
))),
),
],
),
);
}
Above code will give us output like below :
FlexFit.loose
Thanks for reading !!
Do let us know if you need further assistance with flutter.
FlutterAgency.com is our portal Platform dedicated to Flutter Technology and Flutter Developers. The portal is full of cool resources from Flutter like Flutter Widget Guide, Flutter Projects, Code libs and etc.
FlutterAgency.com is one of the most popular online portal dedicated to Flutter Technology and daily thousands of unique visitors come to this portal to enhance their knowledge on Flutter.
Contemporary ventures
Recent blog
ready to get started?
Fill out the form below and we will be in touch soon!
"*" indicates required fields


