How to Use IndexedStack Widget In Flutter?
The application is built by settling how the widgets interact with one another. It suggests that the basis of your application is a widget.
Nearly everything in Flutter is a widget, including layout models. The widgets are where you will find the images, icons, and text in a Flutter application. The rows, columns, and grids that arrange, constrain, and align the evident widgets are examples of non-visible extra widgets.
In this article, we will Explore IndexedStack Widget In Flutter.
Here is the constructor of the IndexStack widget.
IndexedStack(
{Key? key,
AlignmentGeometry alignment=AlignmentDirectional.topStart,
TextDirection? textDirection,
Clip clipBehavior = Clip.hardEdge
StackFit sizing = StackFit.loose,
int? index = 0,
List children = const []}
)
alignment: The non-positioned and partially-positioned children in the stack are aligned using these attributes.
text direction: These properties are used to determine alignment based on the text direction.
sizing: The non-positioned children in the stack are sized using these properties.
index: These attributes are used to display the child’s index.
children: The List uses these properties.
An IndexedStack is a stack in which its index only allows for the display of one component at a time.
a stack that displays a single child from a group of children. It is the child with the specified index who is being shown.
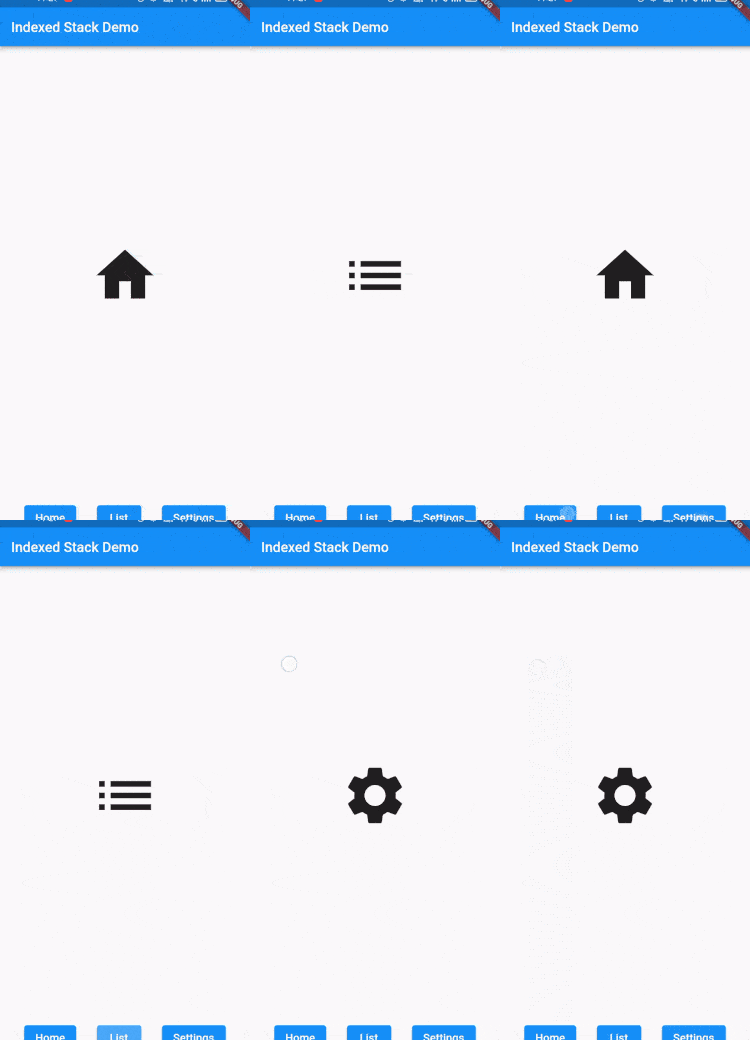
How to construct a custom navigation bar in flutter is demonstrated in the below demo. It demonstrates how a Flutter mobile application development company will use the IndexedStack widget to create a custom navigation bar.
Let’s see a full example of an IndexStack widget.
import 'package:flutter/material.dart';
void main() => runApp(const MaterialApp(home: IndexStackDemo()));
class IndexStackDemo extends StatefulWidget {
  const IndexStackDemo({Key? key}) : super(key: key);
  @override
  _IndexStackDemoState createState() => _IndexStackDemoState();
}
class _IndexStackDemoState extends State {
  int index = 0;
  @override
  Widget build(BuildContext context) {
    return Scaffold(
      appBar: AppBar(
        title: const Text('Indexed Stack Demo'),
      ),
      body: Padding(
        child: Column(
          children: [_stackedContainers(), _navigationButtons()],
        ),
        padding: const EdgeInsets.all(5.0),
      ),
    );
  }
  Widget _stackedContainers() {
    return Expanded(
      child: IndexedStack(
        index: index,
        children: const [
          Center(
            child: Icon(
              Icons.home,
              size: 100,
            ),
          ),
          Center(
            child: Icon(
              Icons.list,
              size: 100,
            ),
          ),
          Center(
            child: Icon(
              Icons.settings,
              size: 100,
            ),
          ),
        ],
      ),
    );
  }
  Widget _navigationButtons() {
    return Row(
      mainAxisAlignment: MainAxisAlignment.spaceEvenly,
      children: [
        ElevatedButton(
          child: const Text(
            'Home',
            style: TextStyle(fontSize: 16.0, color: Colors.white),
          ),
          onPressed: () {
            setState(() {
              index = 0;
            });
          },
        ),
        ElevatedButton(
          child: const Text(
            'List',
            style: TextStyle(fontSize: 16.0, color: Colors.white),
          ),
          onPressed: () {
            setState(() {
              index = 1;
            });
          },
        ),
        ElevatedButton(
          child: const Text(
            'Settings',
            style: TextStyle(fontSize: 16.0, color: Colors.white),
          ),
          onPressed: () {
            setState(() {
              index = 2;
            });
          },
        ),
      ],
    );
  }
}
Output:


Conclusion:
Today our Flutter experts has given a basic explanation of the IndexedStack Widget’s fundamental structure in the article; you are free to change the code as you see fit. This was a brief introduction from my end to the IndexedStack Widget On User Interaction, which utilizes Flutter to function.
Contemporary ventures
Recent blog
ready to get started?
Fill out the form below and we will be in touch soon!
"*" indicates required fields


