Adding Row Space in Flutter: A Simple Process
The UI of an application is built using an array of components. Using widgets in Flutter, we generate these elements. Consider buttons, text boxes, scroll bars, and dropdown menus with customized options. Use of widgets was used to make each of these.
You can view some widgets (Flutter conditional show widgets) while you can’t see others (stateless widgets). Texts, photos, icons, buttons, and other items fall under stateful widgets. On the other hand, stateless widgets control how the visible ones will look on the screen. For a better understanding of the UI design of an app, you must be familiar with both categories of widgets.
The UI design’s crucial component is the Flutter row spacing. Developers occasionally struggle with figuring out how to arrange components in rows and columns. You won’t experience any problems interacting with the UI of your app after reading this guide.
Let’s explore Flutter row spacing in-depth to learn how to quickly create app user interfaces.
In Flutter, what does a Row Widget mean?
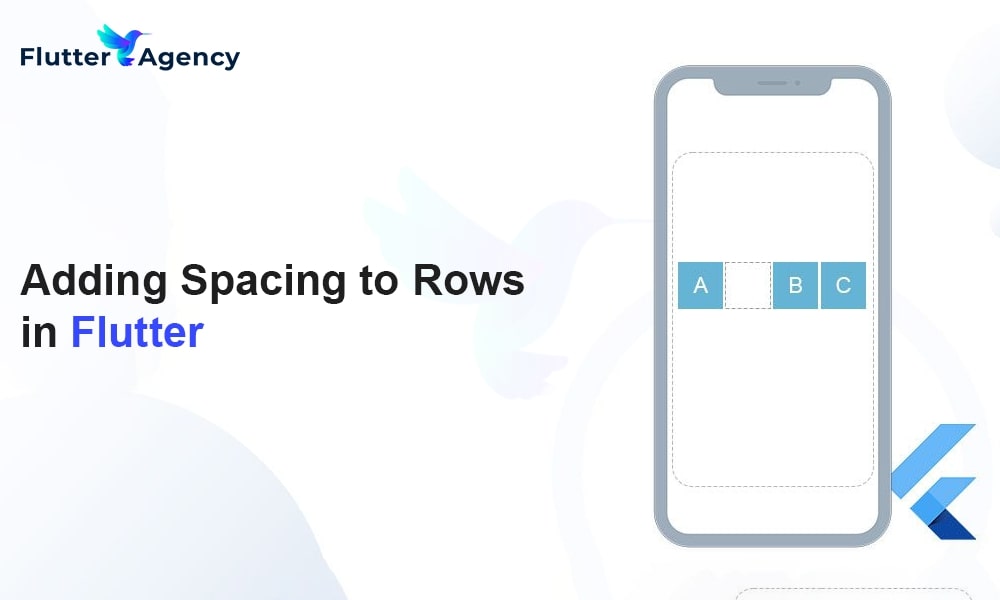
Several widgets, including the row widget, are included with Flutter frameworks. As the name implies, it is used to align components horizontally or in rows. To make the UI look cleaner and enhance the user experience simultaneously, we need to separate the elements displayed in a row. We can still fulfill this goal by using flutter row spacing.
Flutter Row Spacing
You can align the objects or arrange them in the row however you like using a few settings that the row widget has. These features are MainAxisAlignment, SizedBox, Spacer, and Expanded. Every technique for adding space between row widgets in Flutter will be covered in this blog.
Without further ado, let’s get to the strategies used in Flutter to increase space between rows.
1. SizedBox
The most flexible, easy-to-understand, and efficient approach for flutter row spacing is SizedBox.
A SizedBox widget is just an empty box if no limitations are given. The size of the parent widget determines its default height and width, but you can modify them to meet your needs. You must specify the width attribute if you use the SizedBox widget in the row widget. If you’re using SizedBox in the column widget, you must also specify the height attribute.
How do I change the Flutter font size for my screen?
The following is an example of code that uses SizedBox to adjust Flutter row spacing:
 Row(
          children: [
 SizedBox(width: 40),
            Text(
              'Item 1',
              style: TextStyle(fontSize: 24),
            ),
            SizedBox(width: 40),
            Text(
              'Item 2',
              style: TextStyle(fontSize: 24),
            ),
            SizedBox(width: 40),
            Text(
              'Item 3',
              style: TextStyle(fontSize: 24),
            ),
          ],
        )
Output

2. MainAxisAlignment
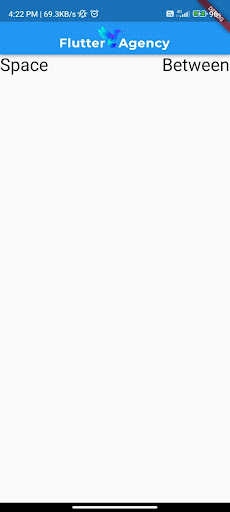
You can create a predetermined space between the widgets with the help of the MainAxisAlignment property. You must add a child widget for the components in a row to be arranged equally. It’s interesting to note that MainAxisAlignment has three child widgets. These are the three types of space: between, evenly, and around. Let’s talk about them one by one.
1. spaceBetween
To specify the distance between components inside a row widget, use the spaceBetween row’s child widget. It automatically positions your objects according to the size of the screen.
The example code is as follows:
 Row(
          mainAxisAlignment: MainAxisAlignment.spaceBetween,
          children: [
            Text(
              ‘Space',
              style: TextStyle(fontSize: 24),
            ),
            Text(
              ‘Between',
              style: TextStyle(fontSize: 24),
            ),
          ],
        )
Output
2. spaceEvenly
You may maintain equal space between the elements in a row by using the spaceEvenly child widget.
The code example is as follows:
 Row(
          mainAxisAlignment: MainAxisAlignment.spaceEvenly,
          children: [
            Text(
              ‘Space',
              style: TextStyle(fontSize: 24),
            ),
            Text(
              ‘Evenly',
              style: TextStyle(fontSize: 24),
            ),
          ],
        )
Output
3. spaceAround
In contrast to adding an even amount of space between the two components, the spaceAround child widget also adds half of that space before and after the first and last child.
The code example is as follows:
 Row(
          mainAxisAlignment: MainAxisAlignment.spaceAround,
          children: [
            Text(
              'Space',
              style: TextStyle(fontSize: 24),
            ),
            Text(
              'Around',
              style: TextStyle(fontSize: 24),
            ),
          ],
        )
Output
3. Spacer
To suit your needs, you can change the spacing between the elements in a row with the spacer widget. Without a space specification, the spacer widget occupies the entire space and drags the components to the edges. Use the Flutter flex property to specify how much space you want to keep between the two widgets if you want to alter the distance between them.
The code sample for using the spacer for flutter row spacing is shown below.
 Row(
          children: [
            Text(
              'Item 1',
              style: TextStyle(fontSize: 24),
            ),
            Spacer(),
            Text(
              'Item 2',
              style: TextStyle(fontSize: 24),
            ),
            Spacer(),
            Text(
              'Item 3',
              style: TextStyle(fontSize: 24),
            ),
          ],
        )
Output
4. Expanded Widget
Another way to add spaces between the row items is to use the Expanded widget. Any child row wrapped inside the Expanded widget fills the screen’s available area.
To help you understand how it works, below is an example of the code:
 Row(
          // mainAxisAlignment: MainAxisAlignment.spaceAround,
          children: [
            Expanded(
              child: Text(
                'Item 1',
                style: TextStyle(fontSize: 24),
              ),
            ),
            Text(
              'Item 2',
              style: TextStyle(fontSize: 24),
            ),
            Text(
              'Item 3',
              style: TextStyle(fontSize: 24),
            ),
          ],
        ),
Output
Conclusion
As you have read, we have reviewed every method to add row spacing in Flutter. If you want our recommendation, we recommend using the mainaxisalignment option since it offers complete control over the element place. You can use the space around, space-between, and space equally child widgets, among others.
You may depend on us if you need to hire a Flutter developer for any of your app development requirements. We are a group of talented programmers with a track record of creating successful apps for companies worldwide. View our case studies for app development to better illustrate our work.
Frequently Asked Questions (FAQs)
1. How can I make row Flutter smaller?
Try wrapping the Expanded widgets with a Flexible widget to minimize the space around them. While Flexible functions similarly to Expanded, it permits its descendants to occupy less space if necessary.
2. What does a spacer widget answer?
The Spacer Widget inserts a block of space wherever on your page. This blank space can be filled with a color or an image. You may make amazing elements and shapes using it as well.
3. In Flutter, how do you give a row width?
You can use the Expanded widget to change the children of a Column or Row based on the height or width of the screen. The Expanded widget enables the widget to grow and take up the entire space. The flutter widget can be sized according to the screen’s height and width by selecting the proper flex value.
Contemporary ventures
Recent blog
ready to get started?
Fill out the form below and we will be in touch soon!
"*" indicates required fields


